Exploration of photographic techniques related to different lens-based photographic techniques by the use of different recording and presentation techniques: – digital and analogue photography, – different camera formats. to include: – standard photographic presentation, – video, – installation, – slide show projection.
criterias
P1 – Identify lens-based image making (Show examples of lens based images and comment on the techniques and technology used within these images)
P2 – Develop ideas using lens-based technologies (Show through own images the use and development of lens based technologies)
P3 – Produce and present final outcomes for a set brief (Present final images for the project)
P4 – Use lens-based technologies and techniques within own work (See P2 Use camera, lenses to capture final images for the project)
P5 – Review own lens-based outcomes (Comment on own images looking at Visual style and photographic techniques applied in own work.)
M1 – Describe lens-based outcomes Comment in depth on the use of lens based technologies and techniques. Research other artists’ work in context of own ideas.
M2 – Purposefully produce individual ideas against a given theme of brief and produce photographic images that will demonstrate link to the research and clear progression through ideas.
M3 – Produce and present considered final outcomes for a set brief, with coherent use of lens-based technologies and techniques. See M2. Present final images to a professional standard that will reflect the development of your ideas and research.
M4 – Justify own lens-based outcomes. Explain how the use of techniques and technologies in own images informed the development of the project. Look at strengths and weaknesses of the project.
D1 – Use examples of lens-based image making to inform ideas Develop own ideas strongly linked to the research in primary and secondary sources. Justify the use of the research in own images.
D2 – Produce original ideas and effective final outcomes against a brief, with innovative use of lens-based technologies and techniques. Produce final images that illustrate clearly application of visual style and language as well as the development of photographic techniques linked to the reserach on the project.
D3 – Evaluate own lens-based outcomes. Describe the use of techniques and technology in own images. Look at strengths and weaknesses of own images. What impact has this project had on your development as a photographer, what will you take to your further photographic practice.
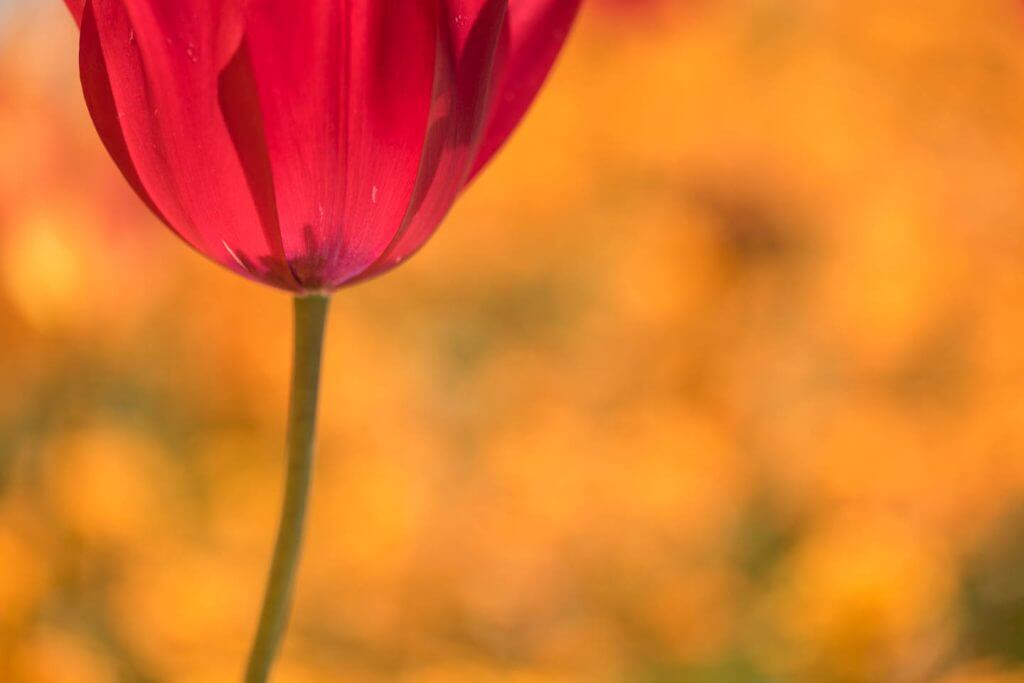
Photographing colors and color contrasts – they are important design tools in photography and can convey emotions very well. The image effect is strongly dependent on the selected colors or grayscale. Colors arise emotions, create moods and captivate the viewer’s gaze. In our world full of colors, it is a challenge to integrate them into an image in such a way that it looks appealing.
Photograph colors and color contrasts
While some photographers handle the colors intuitively, others first have to deal with the effects of colors and practice with them. Colors that are not very saturated appear very soft, sometimes almost a little melancholic. Therefor they are also called pastel shades. Whearas heavily saturated colors convey strength, happiness and are particularly colorful.
Colors differ in terms of tonal value, brightness and effect. The effect of color depends on many factors and is different for every person.
Red tones, orange and yellow are combined with sun, warmth, fire. They are also called warm colors.
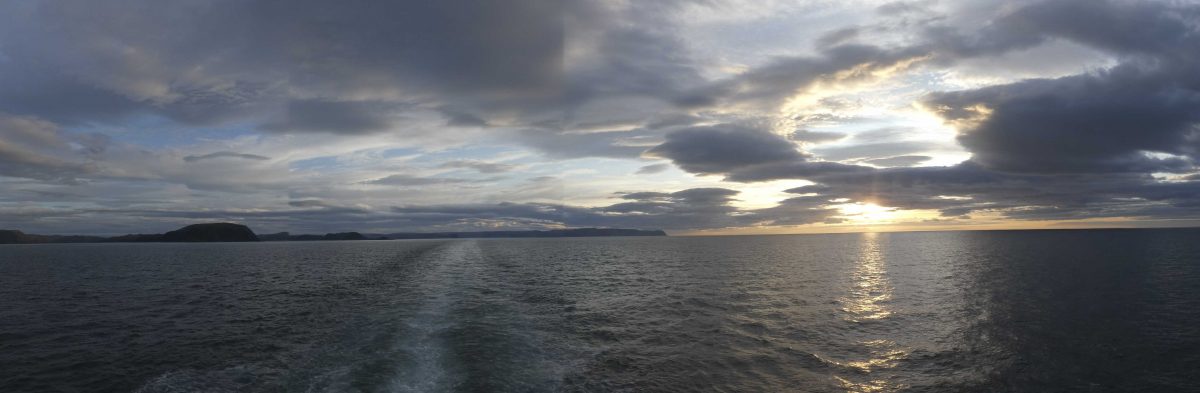
Blue tones like the water, the ice, the snow look cold, even when the lake is in a warm area.
North cap
Yellow and red are signal colors – just think about the color of a wasp or the traffic red light. With signal colors you can set great color accents, but if they appear in the background, they distract you from the main motif.
When photographing colors and color contrasts, you have to be able to assess and interpret the mutual effects. A yellow next to a black works differently than next to light blue or red. Colors can reinforce or weaken each other.
RGB color model
(source: wikipedia)
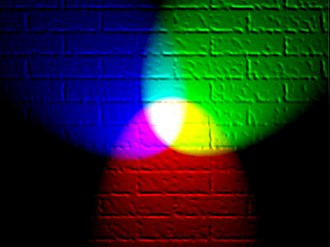
The RGB color model is an additive color model in which red, green and blue light are added together in various ways to reproduce a broad array of colors. The name of the model comes from the initials of the three additive primary colors red, green, and blue. The main purpose of the RGB color model is for the sensing, representation, and display of images in electronic systems, such as televisions and computers, though it has also been used in conventional photography.
The RGB color model is additive in the sense that the three light beams are added together, and their light spectra add, wavelength for wavelength, to make the final color’s spectrum.
A representation of additive color mixing. Projection of primary rgb color lights on a white screen shows secondary colors where two overlap; the combination of all three of red, green, and blue in equal intensities makes white.
This is essentially opposite to the subtractive color model, particularly the CMY color model, that applies to paints, inks, dyes, and other substances whose color depends on reflecting the light under which we see them. Because of properties, these three colors create white, this is in stark contrast to physical colors, such as dyes which create black when mixed.
A representation of subtractive color mixing. Primary color pigments show secondary colors where two overlap; the combination of all three of cyan, magenta, and yellow in equal intensities makes black.
The RGB color model is based on the Young-Helmholtz theoriy of trichromatic color vision, developed by Thomas Young and Hermann von Helmholtz in the early to mid-nineteenth century, and on James Clerk Maxwell’s color triangle that elaborated that theory (circa 1860).
first use of RGB in photography
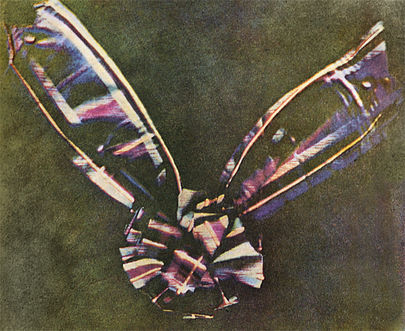
The first experiments with RGB in early color photography were made in 1861 by Maxwell himself, and involved the process of combining three color-filtered separate takes. To reproduce the color photograph, three matching projections over a screen in a dark room were necessary.
The first experiments with RGB in early color photography were made in 1861 by Maxwell himself, and involved the process of combining three color-filtered separate takes.[1] To reproduce the color photograph, three matching projections over a screen in a dark room were necessary.
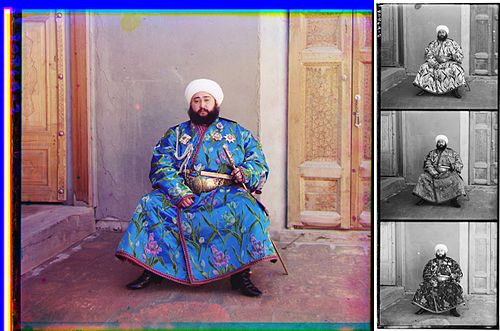
The additive RGB model and variants such as orange–green–violet were also used in the Autochrome Lumière color plates and other screen-plate technologies such as the Joly color screen and the Paget process in the early twentieth century. Color photography by taking three separate plates was used by other pioneers, such as the Russian Sergey Prokudin-Gorsky in the period 1909 through 1915.
A photograph of Mohammed Alim Khan (1880–1944), Emir of Bukhara, taken in 1911 by Sergey Prokudin-Gorsky using three exposures with blue, green, and red filters.
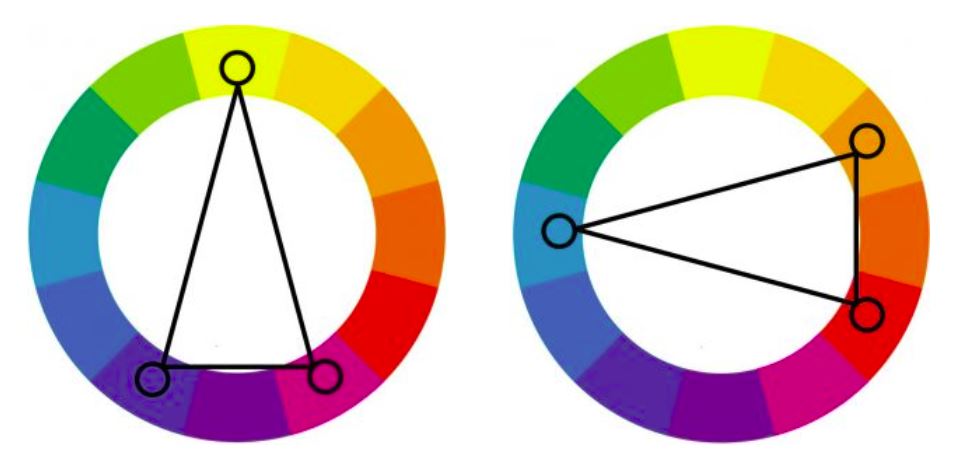
The color wheel according to Johannes Itten
Johannes Itten was a Swiss painter and art theorist. While working with art students, Johannes Itten put together a color theory – the color wheel:
color wheel from Johannes Itten 1961 (c) wikipedia
The primary colors red, blue and yellow are in the middle triangle of the color wheel. Mixing these creates the secondary colors violet, orange and green. If these are mixed again, the colors appear in the outer color wheel. Opposing colors on the color wheel are called complementary colors: yellow is complementary to violet, orange to blue, red to green, etc.
Colors that lie side by side on the color wheel harmonize with each other.
If you want to combine three colors with one another, you can read the trio from the outer color circle with an acute-angled triangle.
Example on the right: red – orange – blue
Color contrast – complementary contrast
If you use two colors in your photo that lie opposite each other on the color wheel, one speaks of complementary colors or of complementary contrast. Red is complementary to green, yellow to violet and blue to orange. Photography during the “blue hour” (the time between sunset and night or between night and sunrise) combined with the warm artificial light is very popular for this reason: The cold-looking blue shades harmonize perfectly with the warm, orange light of the artificial lighting.
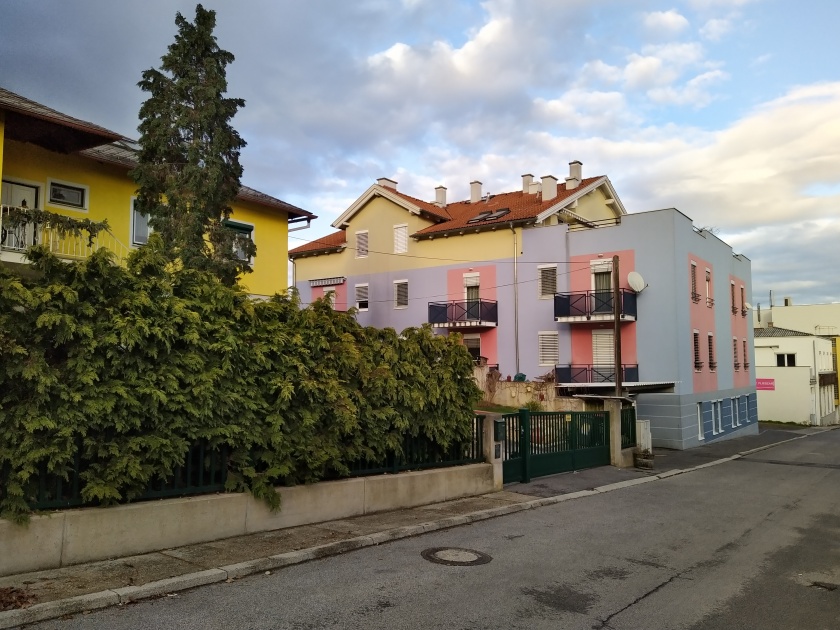
daring choice of selected colors
House in Oberpullendorf / Austria
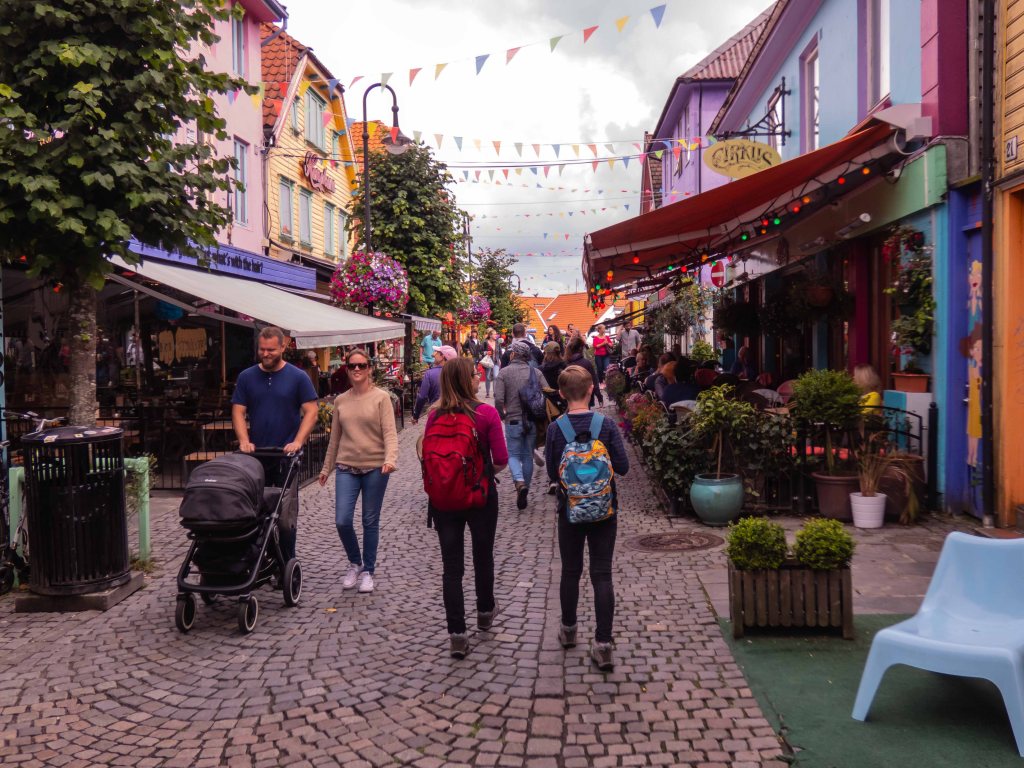
good choice of composed colors
pedestrian street in Bergen
+ / – Compensation
The light meters are calibrated to a medium gray. If you photograph very bright colors like yellow, the light meter means that there is more light and causes a shorter exposure. The opposite happens with green: Green areas are washed out. On cloudy days, the colors look rather faint, while they really start to shine in sunlight.
Depending on the color, you will find that the light meter, which is calibrated to a medium gray, lies next to it. Green tends to overexpose, while yellow tends to underexpose. Correct the exposure for green by -1/3 to -2/3, for yellow +1/3 to +2/3.
HDR stands for High Dynamic Range and means taking a series of images with different exposures, from light to dark, i.e. overexposed to underexposed, in quick succession.
This series of exposures is then merged into an HDR photo, which contains the best of each individual photo with different exposures. By putting together parts from overexposed, underexposed and balanced photos, expressive, “dramatic” pictures are created with beautifully balanced shadows and lights! That simply means, that you can take and display more exposure information with HDR images than it would be possible with a single photo using conventional image sensors.
Many cameras have already the option to select getting an HDR image when triggering the release buttom. The camera will produce automatically an HDR outcome of your selected image.
The time-lapse is a cinematic method for accelerating the long-term recording of motion sequences, in which the frame rate of the recording camera in relation to the playback frequency is reduced. If the recordings are then played back at normal speed, the recorded process seems to run faster. As a result, changes that are not or hardly discernible by humans in real time because of their slow nature are also visible.
Requirements
The recording of the individual film images can be done by hand for short sequences, for long-term recordings either a special separate remote trigger kit or cameras witch are already catered with time lapse software are used. But even without continuous shooting functions, time-lapse recordings are possible by extracting individual images at regular intervals from the film recordings using video editing software.
For good recordings, the lighting conditions should always be the same. This is easily possible in a controlled environment such as a photo studio, but in the open air, depending on the shooting interval, it becomes much more challenging. If shots with an interval of a few seconds are still unproblematic, since the lighting conditions do not change so quickly, it can come with recording intervals of several hours to days to strong brightness fluctuations due to changing weather conditions.
The right time-laps motif
The best way to think about it in advance, which image composition you want to implement for your time-lapse video. Motifs that move slowly are particularly suitable for time-lapse shots.
So good ideas for a time-lapse video could be as followed:
– Sunsets / Sunrises, – Clouds moving across the sky, – Wandering shadows, – Mist clouds in the landscape, – Water, e.g. Stream, waterfall, ocean surf, – Rising flowers, – Melting ice, – Passers, – Road traffic, – Snowfall in winter…
Calculation
To find out all the settings needed to create a time-lapse recording, the following formula is suitable:
z = f x r = a/i
with z = number of images; f = film length (in sec); r = frame rate; a = recording time (in sec); i = interval (eg: take a picture every 2 seconds)
Example: A camera is running at 12 frames per second. The projection of the movie with the normal frame rate (for cinema) of 24 frames per second results in a double time lapse.
Is your subject moving very slowly or a bit faster? Depending on that, you should choose a different time interval. These guidelines will help you to choose the interval frequency:
Passing clouds: every 2 – 10 seconds Sunrise / Sunset: about every 5 – 15 seconds Wandering Shadows: Approximately every 10 – 60 seconds Rising flowers: every 30 – 60 seconds Passers-by: every 1 – 5 seconds
Exaple
Some breathtaking views of Iceland in stunning 8K, shot by Nikon Ambassador Lucas Gilman with the Nikon D850.
own time-lapse films shot at richmond
time-lapse at Richmond Bridge
Technical settings for time-lapse at Richmond Bridge: Panasonic Lumix DZ-FZ82, ISO 100, shutter speed 1/500sec, f/8 Z = 600 f = 4 sec r = 25/sec a = 8 min i = 1pic/5sec
time-lapse at Richmond Station
Technical settings for time-lapse at Richmond Station: Panasonic Lumix DZ-FZ82, ISO 200, shutter speed 1/30sec, f/8 Z = 600 f = 17 sec r = 25/sec a = 17 min i = 1pic/1sec
Slow motion in photography is realized by increasing the picture frame rate when recording and playing back the resulting film at normal speed.
The picture frame rate, is a term used in film and video technology. It describes the number of individual images that are recorded or reproduced per time period.
The human brain perceives successive images as a moving scene starting from around 14 to 16 frames per second. In the beginning of moving pictures (silent movies) 16 frames per second were set for this. With the introduction of the sound film, the frame rate was fixed at 24 Hz.
30 pics / sec
With my low budged Panasonic bridge camera I can take videos in 1280×720 with a picture frame rate of 100 pps. In video resolution 640×480 the camera can take 200 pps.
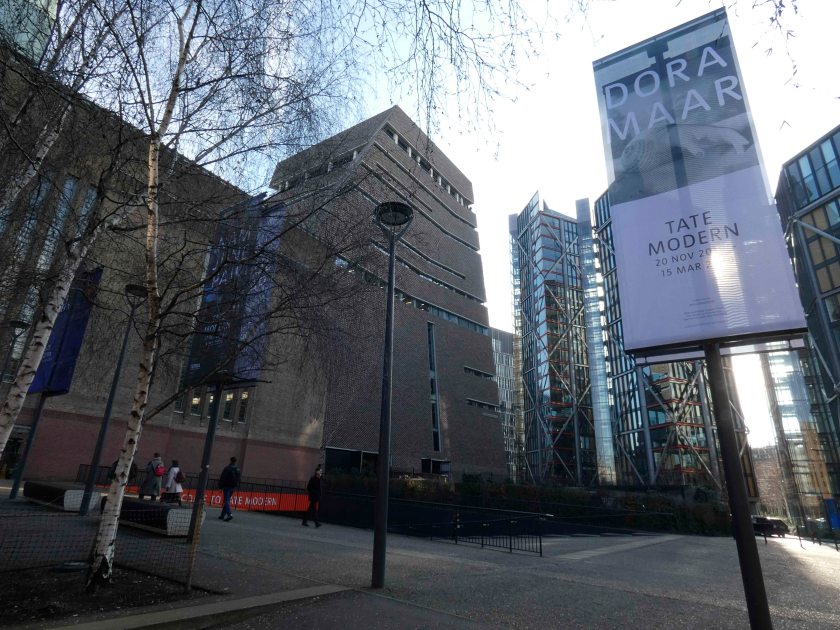
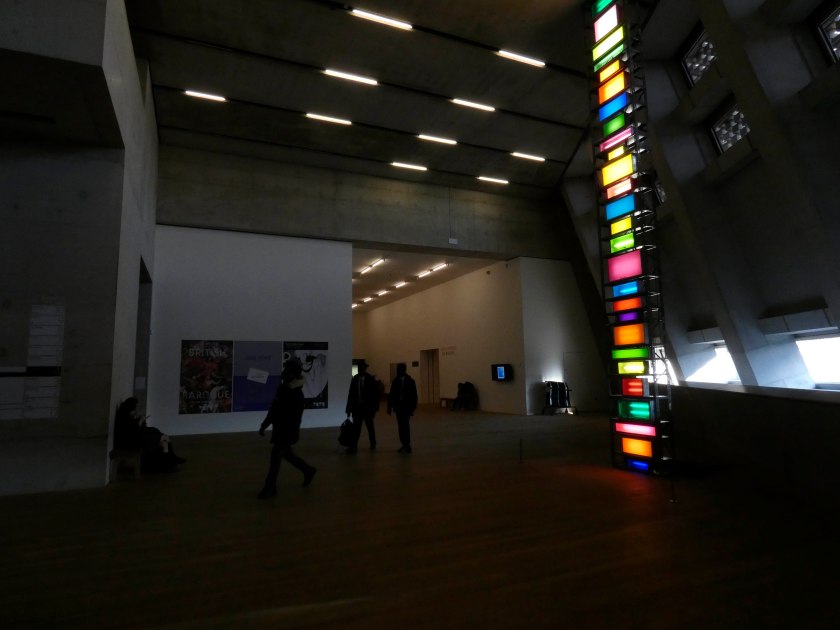
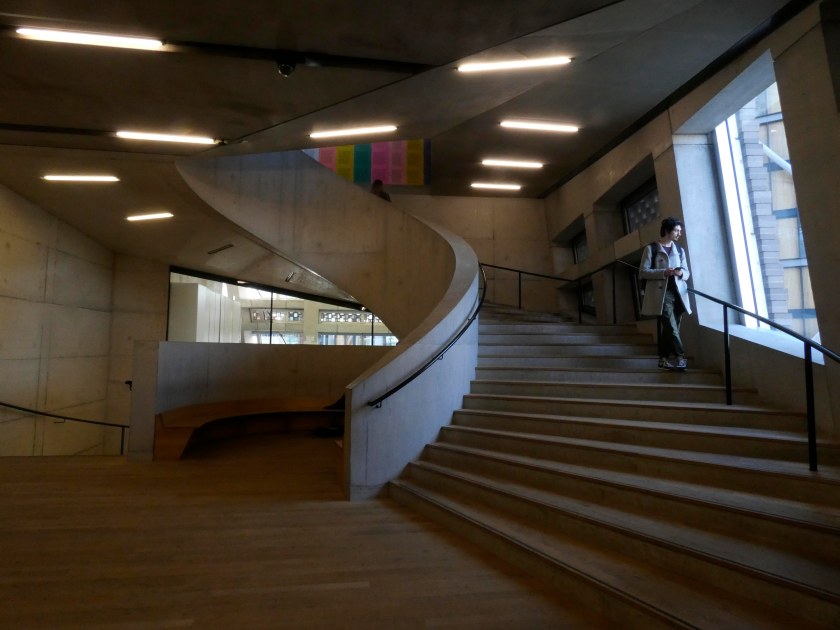
On the 7th of February I went to tate modern to find some inspiration for project work of “Cruel and Tender”. Unfortunately the appropriate exhibition had already finished replaced by the French photographer “Dora Maar”. I just watched remained art works which were open to the public.
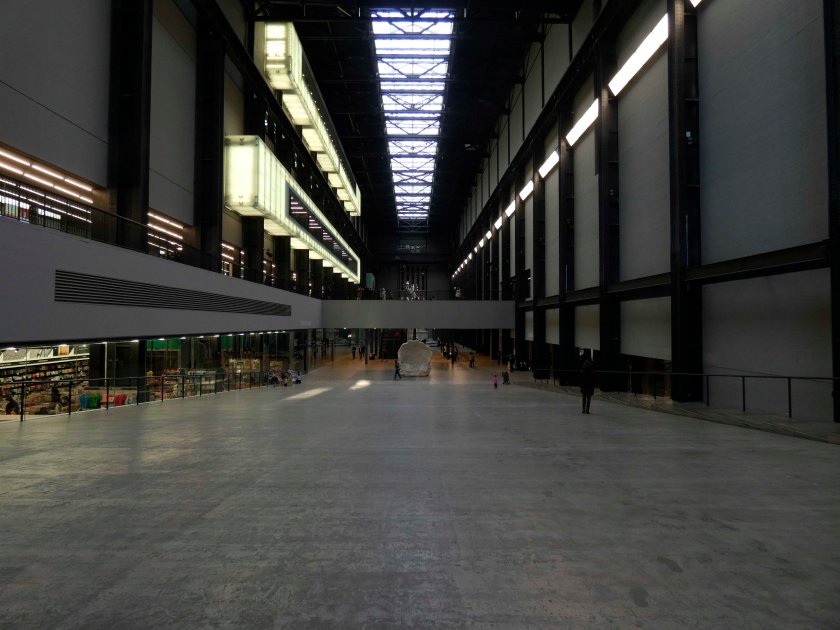
Display of “Living Cities”
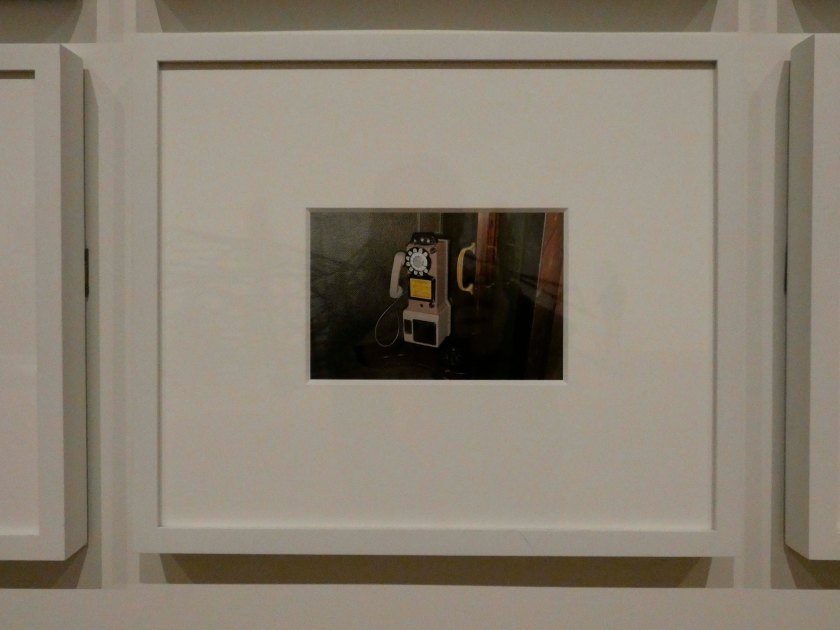
There were some very nice photographes which attracted me in terms of humans and urban live.
This display includes a variety of responses to the modern city from artists around the world, ranging from explorations of the built environment to close-up images recording the minutiae of daily life. The artworks here date from the 1970s right up to the present day, commenting in various ways on th cities in which the artists themselves have lived and worked.
In particular, the artists reveal aspects of the city that would not be considered part of a traditional overview. Considering characteristics of urban living such as displacement and migration, sub-culture and community, utopian plans for an ideal city, or power and political uprising, they uncover the hidden stories that fall outside of the tourist guidebooks and A-Z maps.
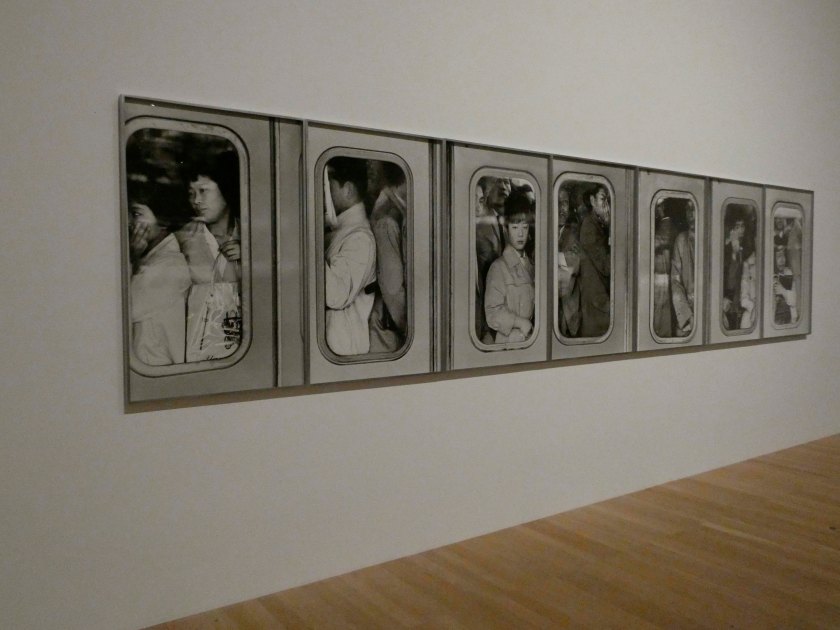
photographs of Naoya Hatakeyama
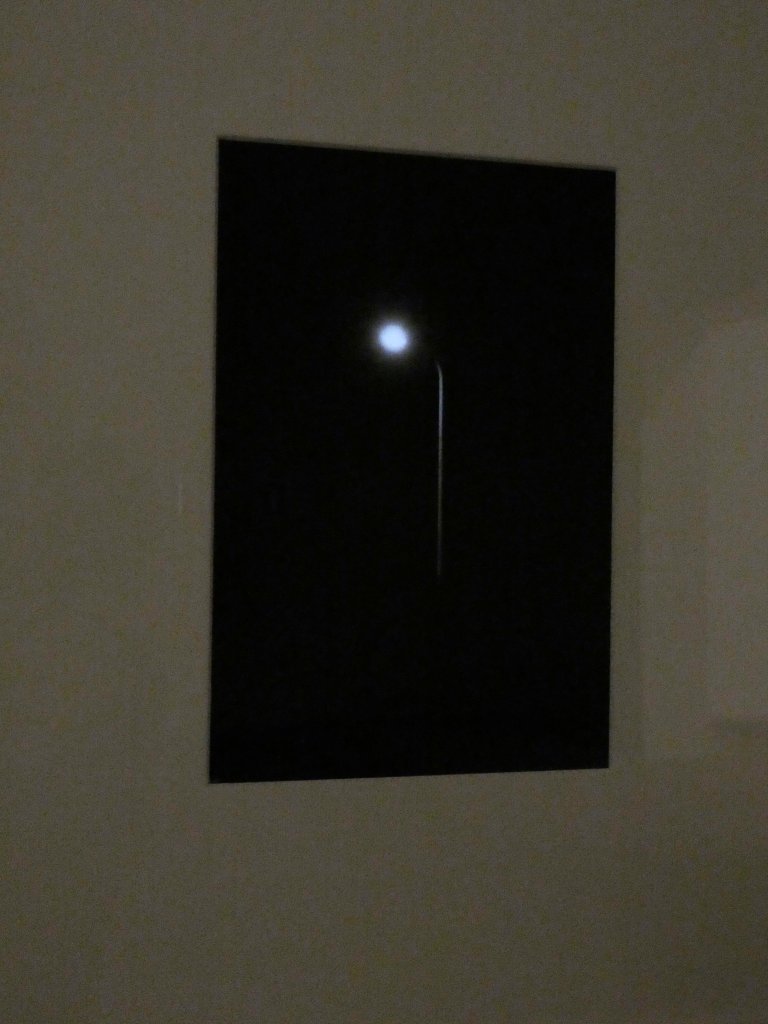
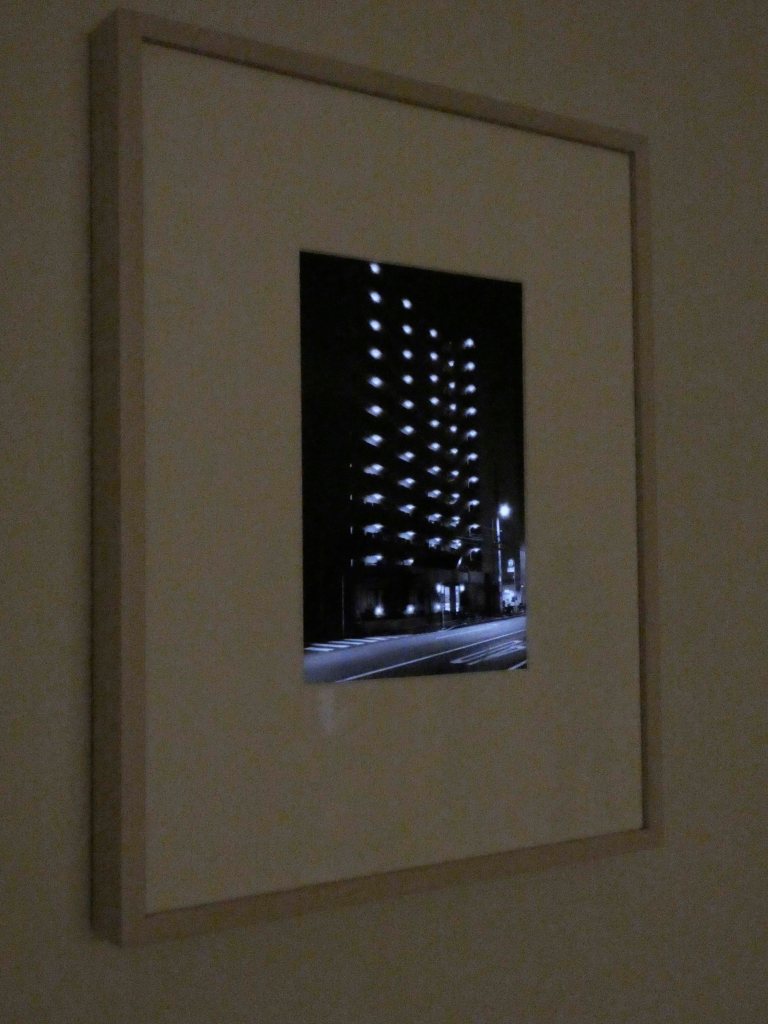
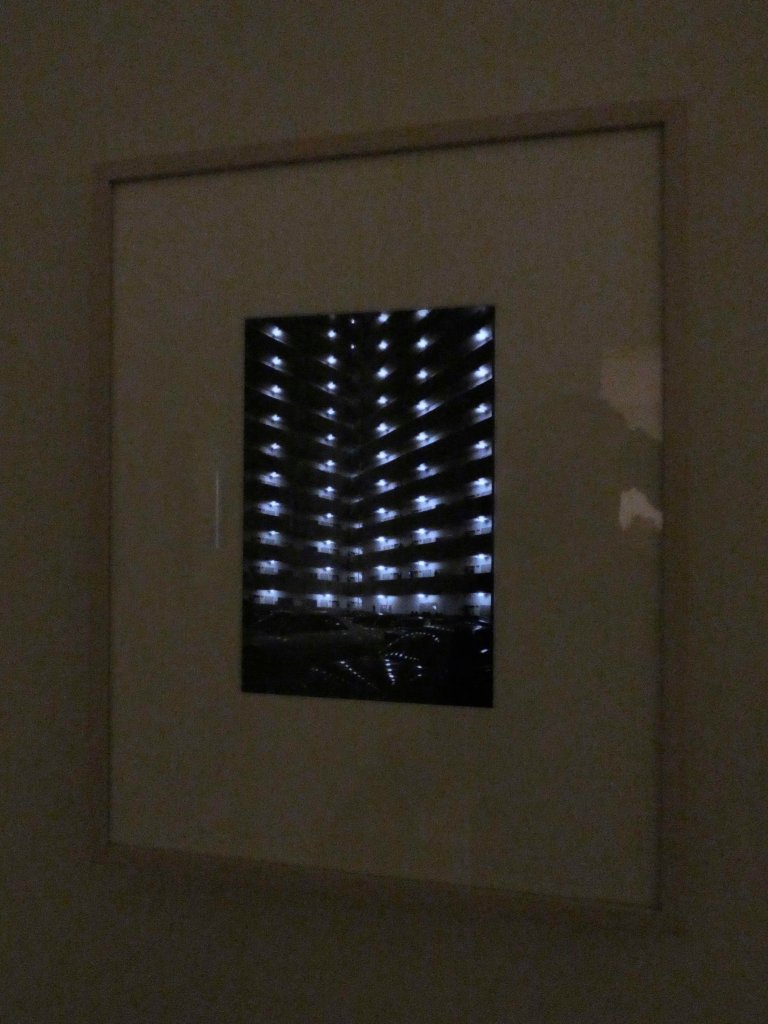
I was inspired by art works of the Japanese photographer Naoya Hatakeyama. His photographs explore our relationship with both urban and natural landscapes. Following he records patterns of lights found in built environment in Tokyo, Japan.
“Everything is Illuminated”
Hatakeyama describes his approach to the series Maquettes/Light, “The night view of Tokyo is especially shimmering. One can often find nightlights regularly lining an exterior passageway that connects the individual units of an apartment building. The appearance of regularly linded flourescent lights is characteristic of Tokyo’s skyline at night. I started taking pictures of this kind of light with a small camera around 1995. i got on a motorcycle every night and went out here and there and gathered the lights of the apartment and other buildings.”
The photographs were taken using a small camera, placed on a tripod. When framing a subject, Hatakeyama paid particular attention to its verticality. He adjusted the settings on his camera, exposing his black and white film to light for two to ten seconds. For each image the chosen exposure was just enough to reveal a division between a building and the night sky.
Hatakeyama experimented with the display of the photographs. He first produced them as gelatin silver prints. Feeling something was missing, he made black and white transparencies from the same films. He assembled the original paper prints on these transperencies and placed them on light-boxes. This layering of both paper prints and transparencies emphasised the dark areas of shadow in his images while still allowing light to shine through the highlighted parts. The resuliting work on light-boxes feature sharp contrasts, the darkest areas of his images double in density and the brightest points appear more brilliant. Hatakeyama titled the work Maquettes/Light. He felt his images of buildings at night, lit and scaled down, resemble architectural models.
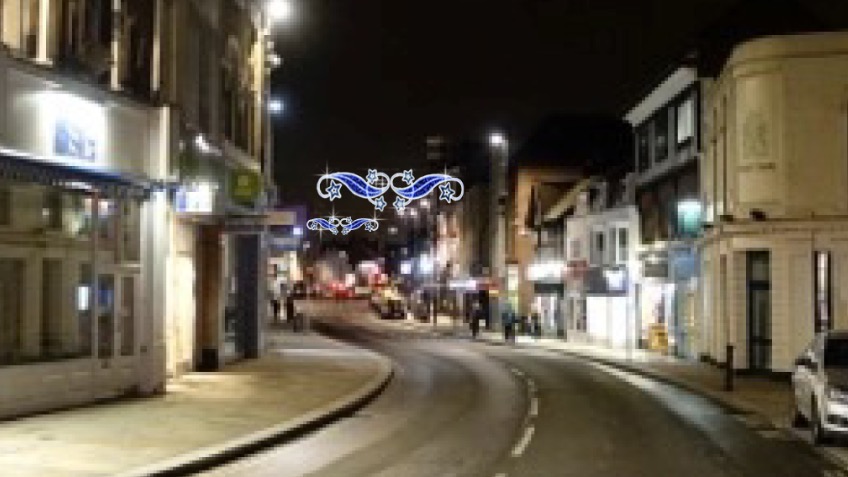
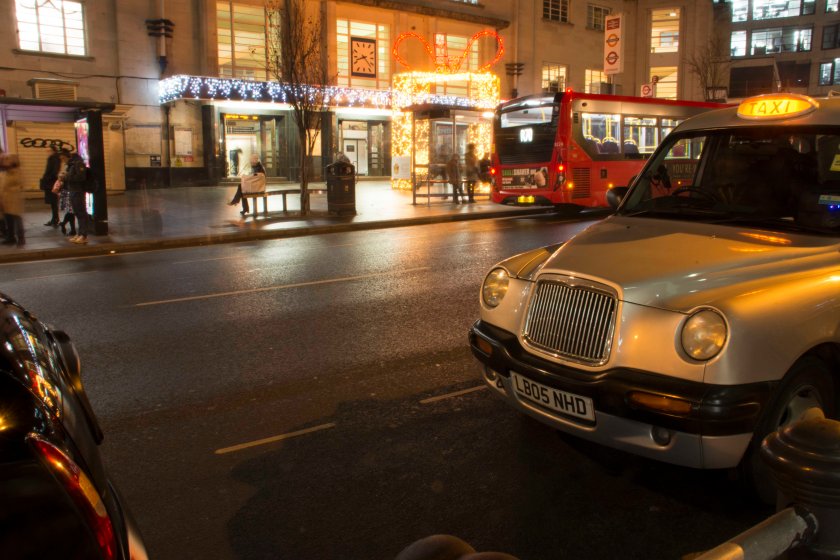
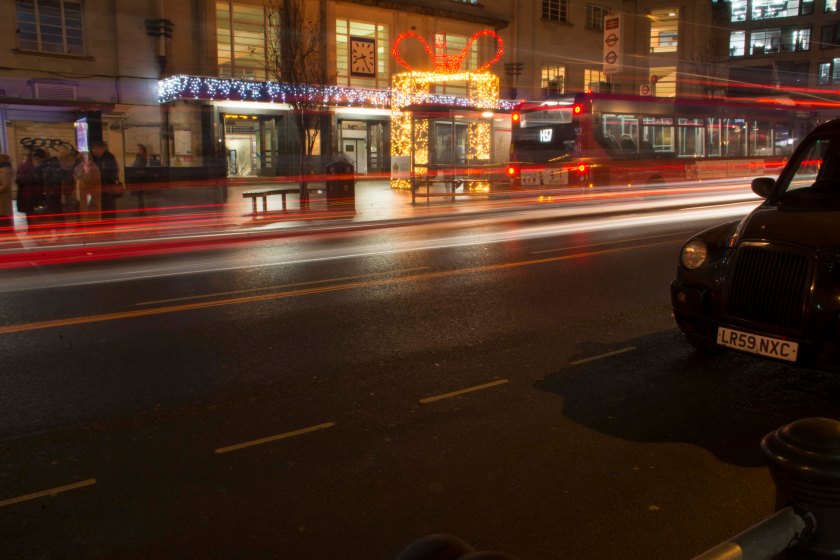
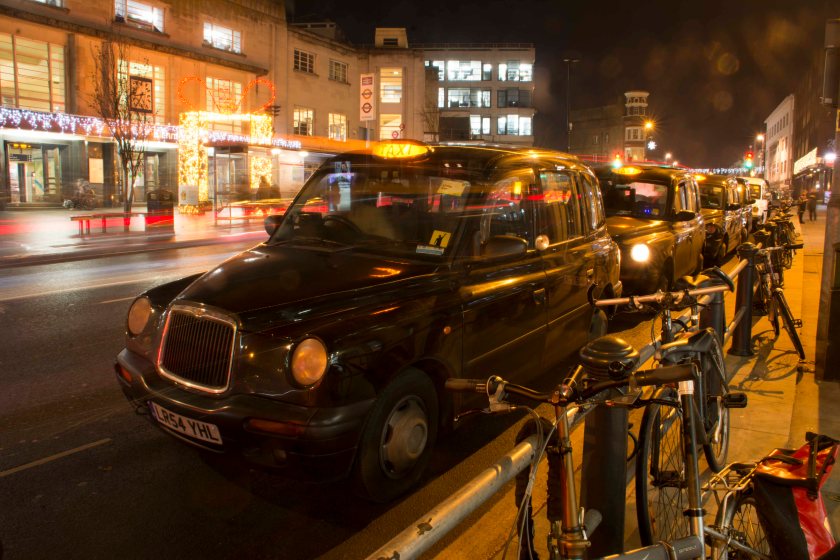
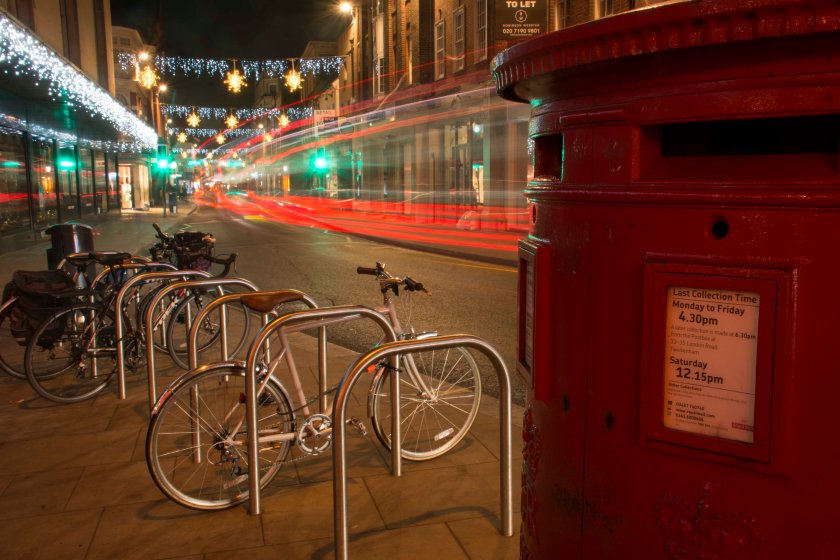
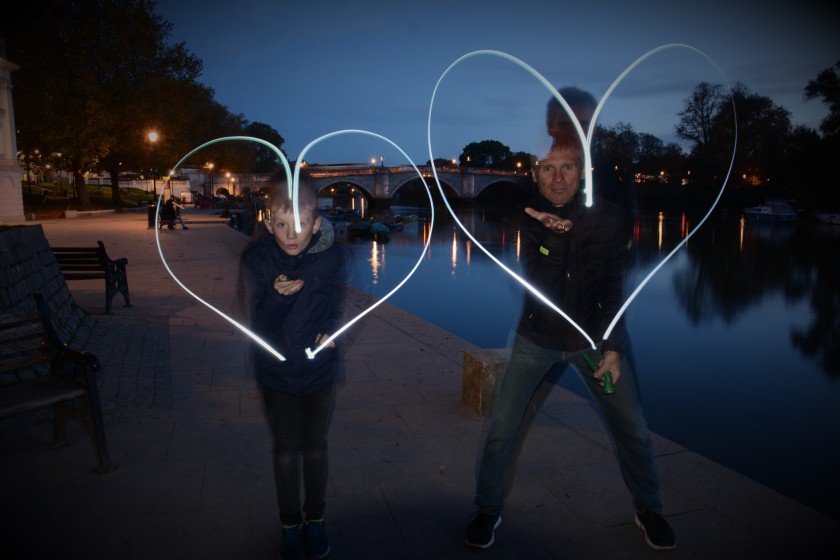
Richmond George Street is not only a good place take fantastic pictures of sparkling Christmas lights as the following one to The Quadrant, George Street and Duke Street.
I was looking for a place where I could create some light painting created by car and bus lights. The objects in the foreground should be ideally sharp and well exposed. Which was not that easy because the parking taxi cars were always slowly pushing ahead. So I changed place.
But there was still something missing to get a better result. The back ground with the iluminated restaurant was too boring to be a more interesting night shoot.
Finally I think I’d found a good place for the spot and also some good objects to fill in the foreground. I used a huge f-stop in order to assure a sharp range of depth of field. From the letter box until the last buildings in the background where sharp enough. Shutter speed was selected to 30 sec to assure that enough vehicles would pass through the picture frame. I like espeacially the first bike at the bike stand which is well exposed. With some post production effects might be some further improvments achievable.
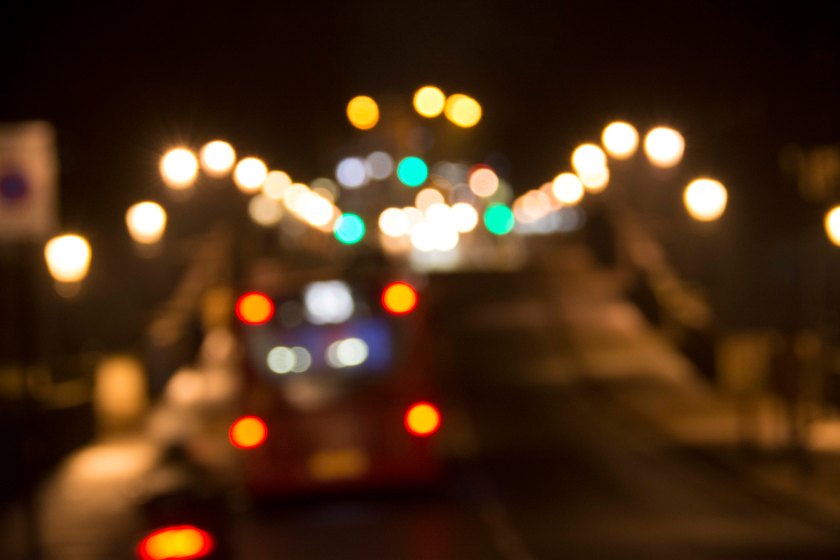
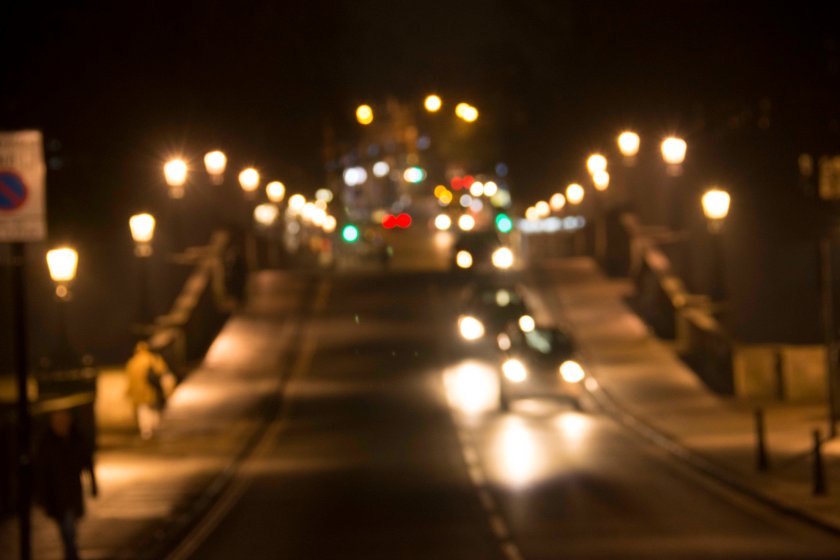
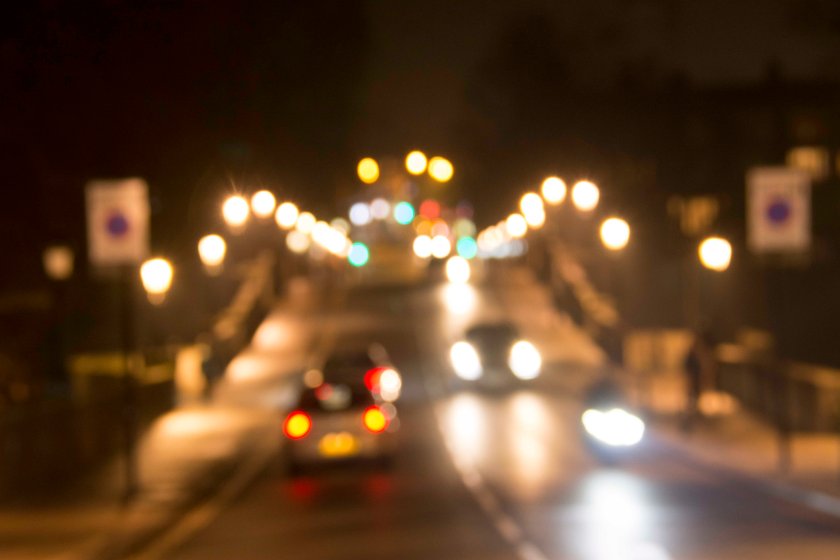
background blur effect
richmond bridge
At Richmond Bridge I was playing a bit around with changing the camera settings in order to create some blured light sources in the background. This bokeh effect can be achieved by using a wide aperture and close manual focus. The choosen out of focus light sources of street lights and car lights look like neat circles in the background of the photograph.
Aparently my aperture was still not wide enough and I miss some focussed objects in the foreground.
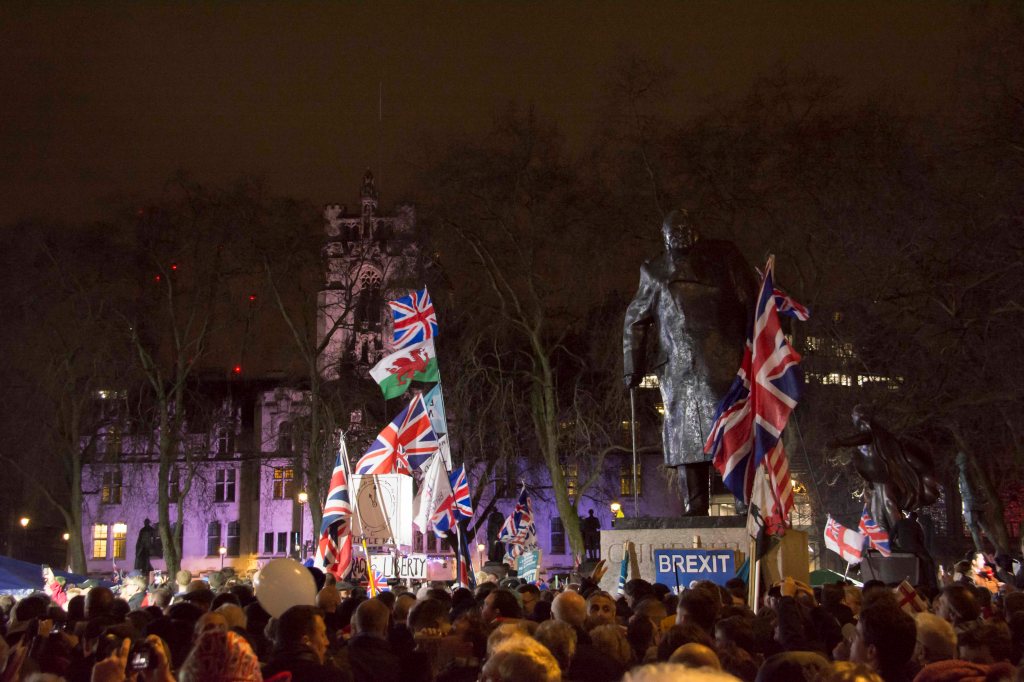
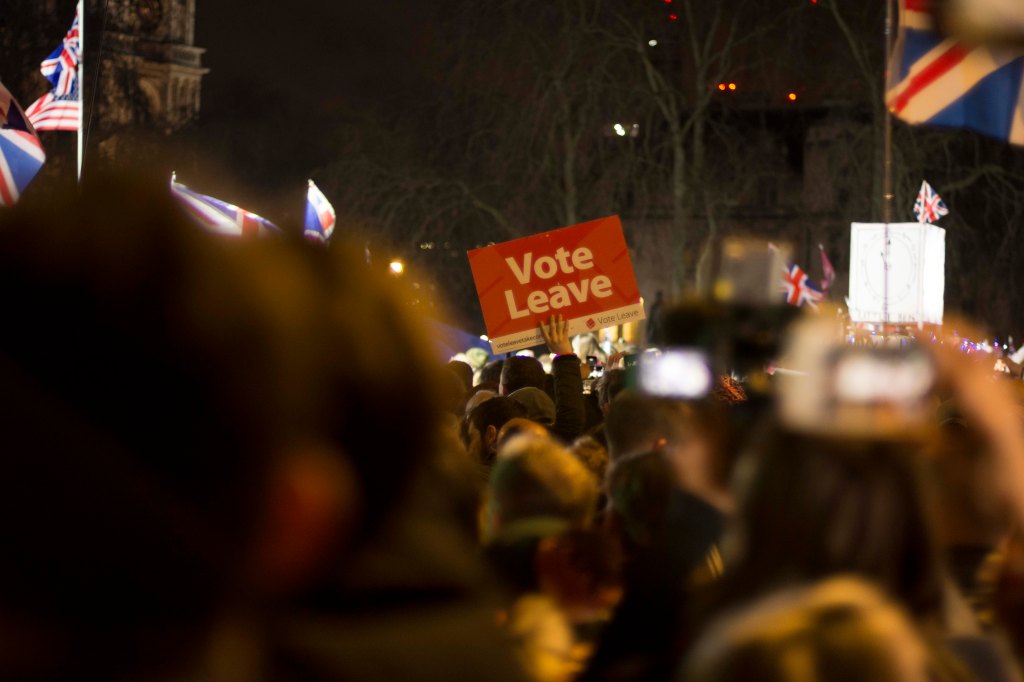
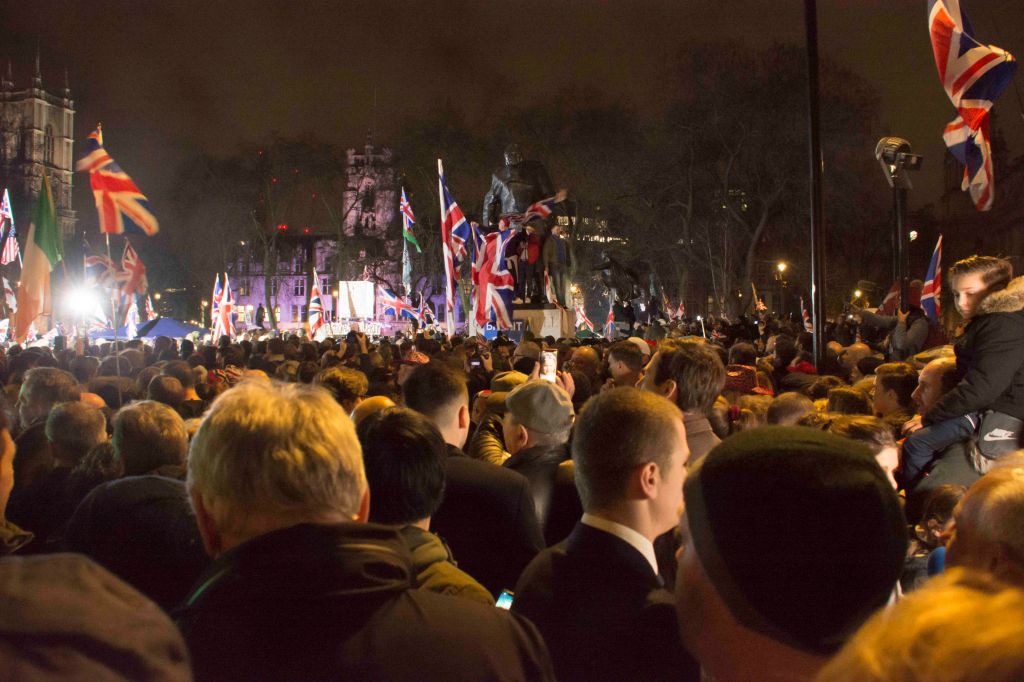
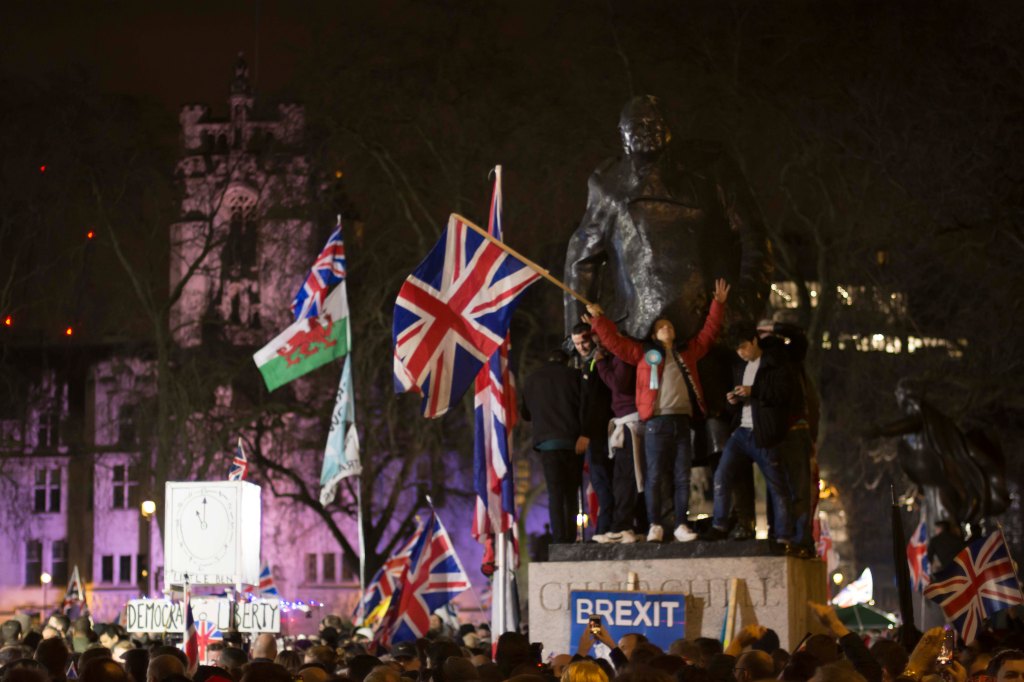
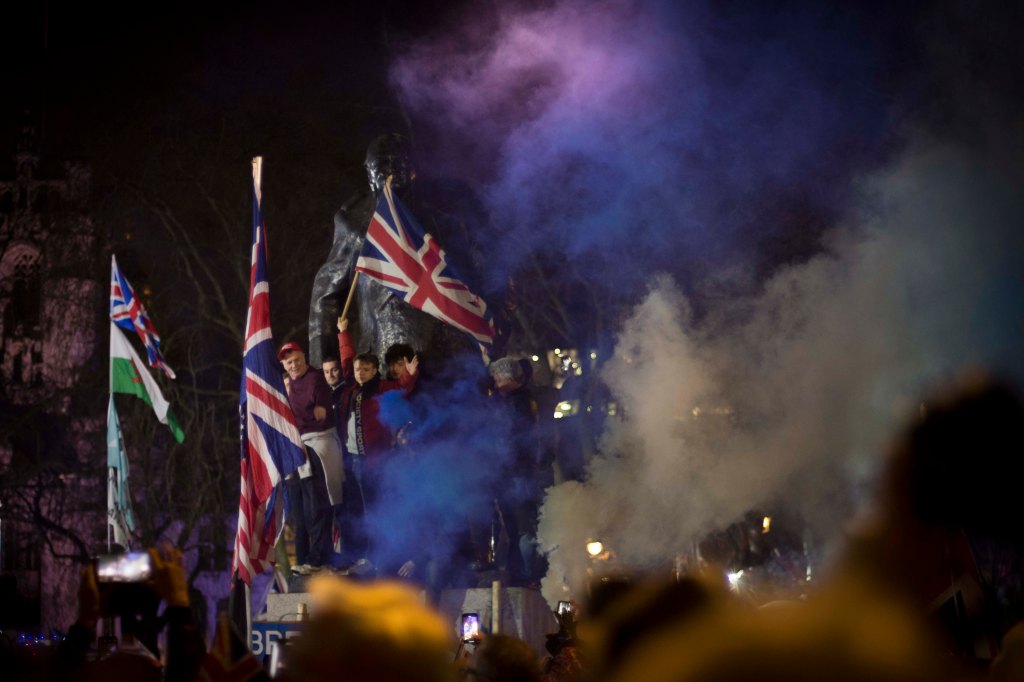
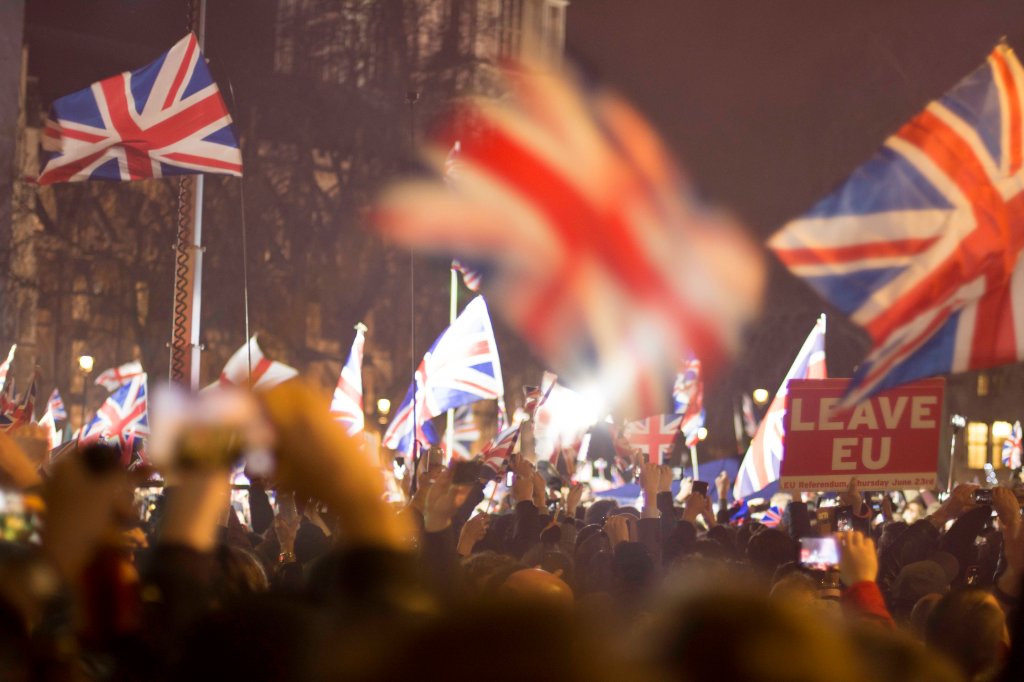
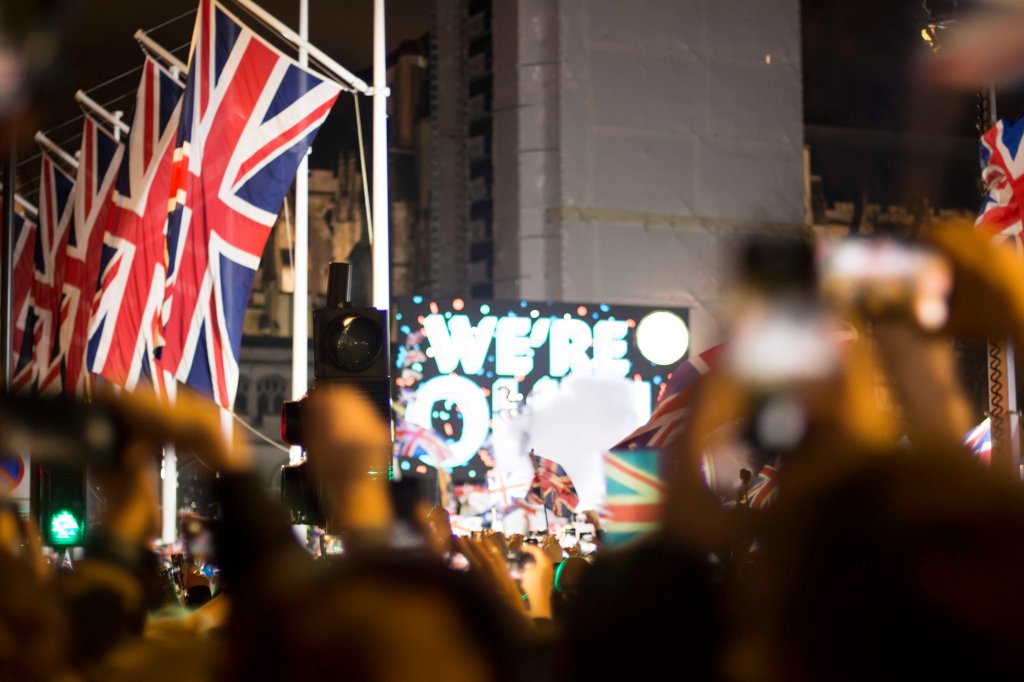
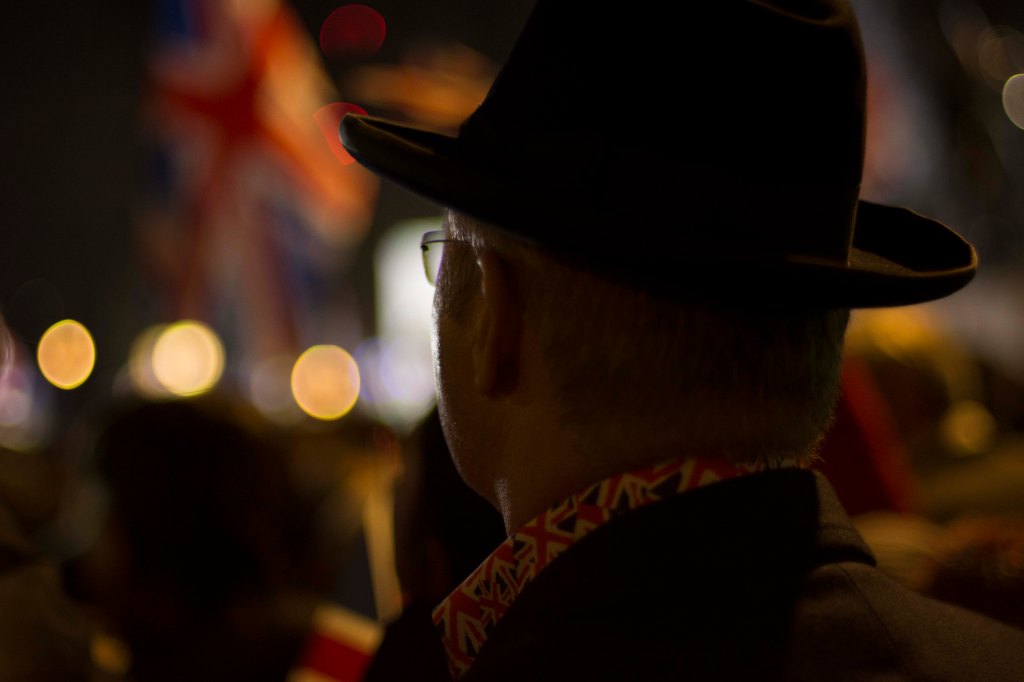
London – Parliament square
At 31.01.2020 I’d been at Parliament Square just to whitness BREXIT amongst leavers when they celebrate the coutdown together with Nigel Farage. To catch the following picture, I used my 50mm lense at its widest aperture f 1.4. The participant in the foreground was in focus and the background light sources and the Union Jak became very blur.
That picture was taken after 11PM, when UK symbolicly left the EU. Maybe the person in the foreground seamed to reflect, whether it was right or not, how knows. Anyway I didn’t use the flash to have the person only in ambient rest light. I might have to adjust brightness in the center slightly.
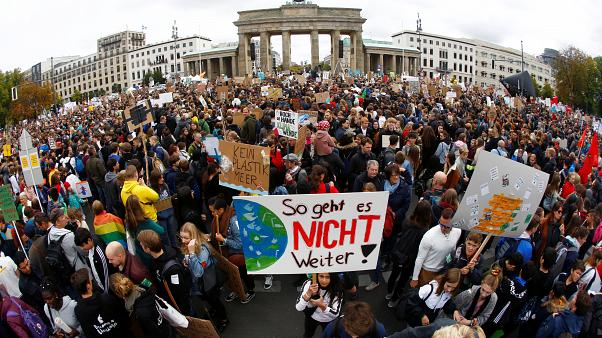
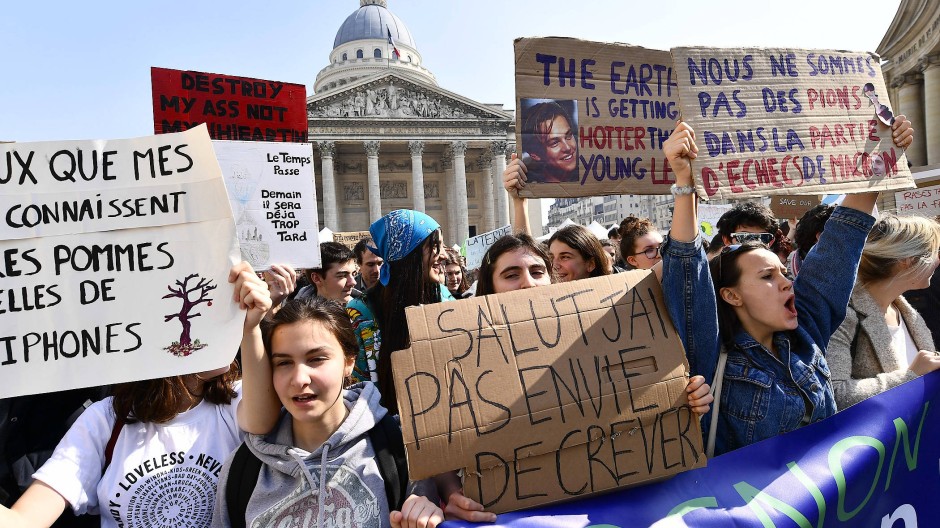
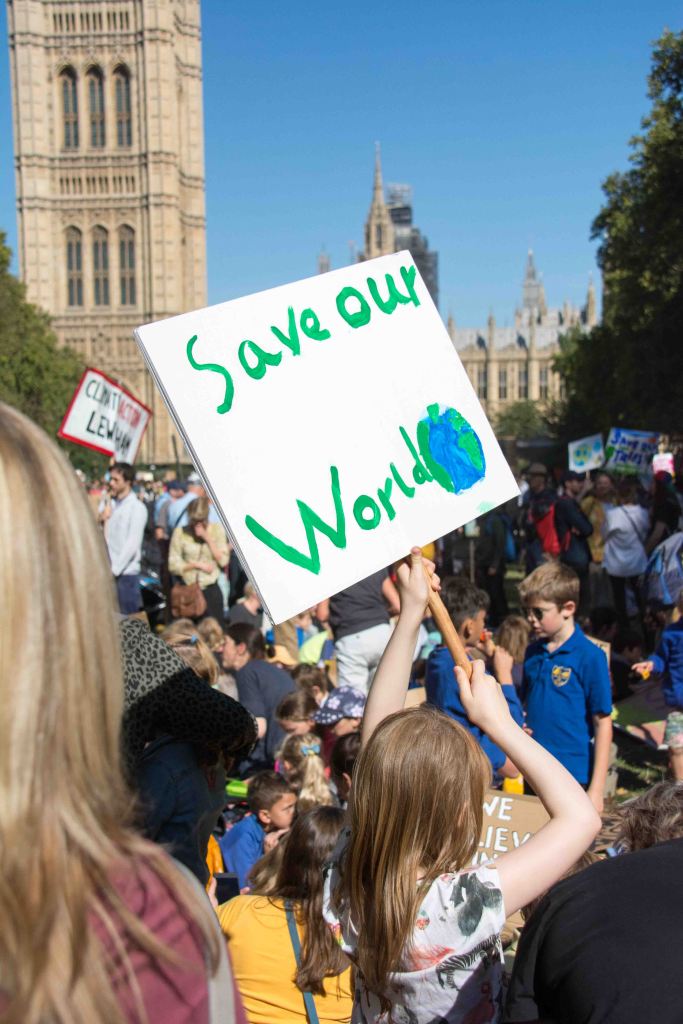
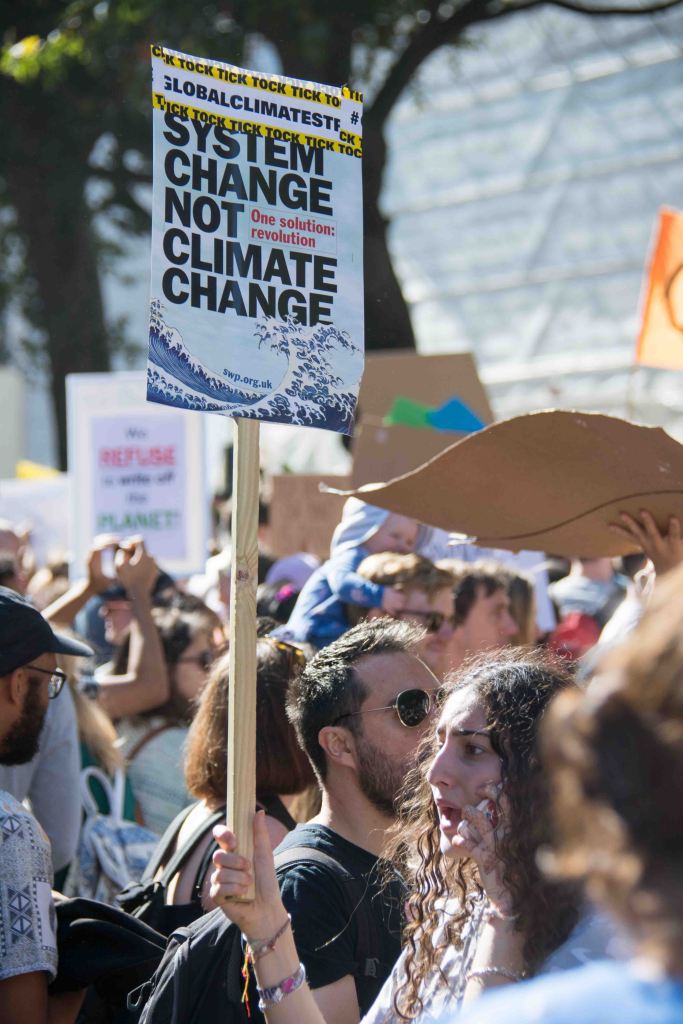
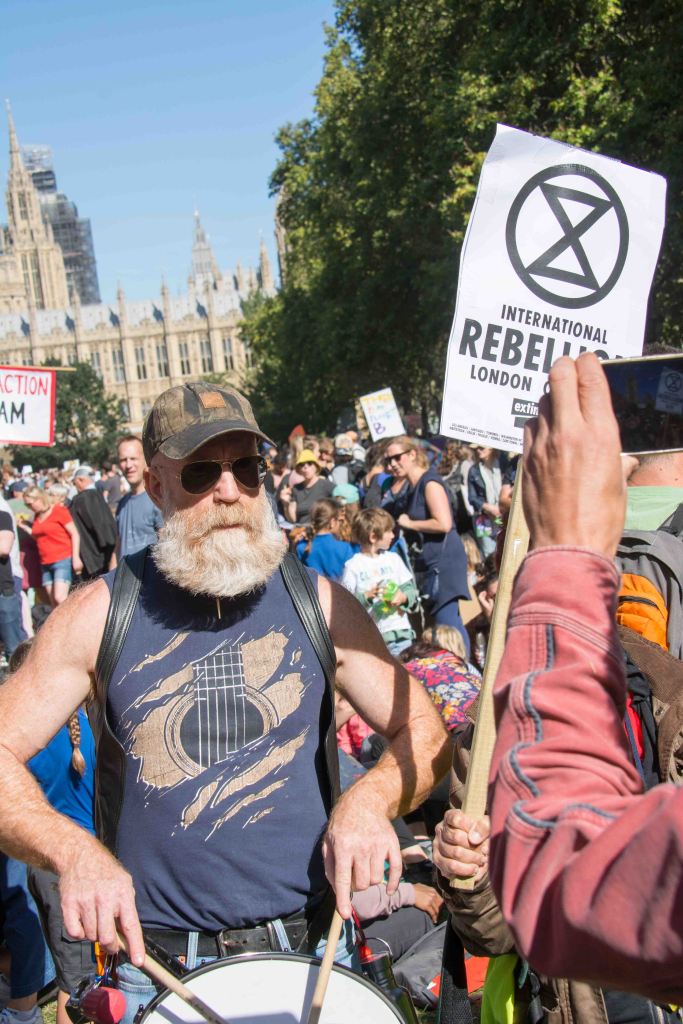
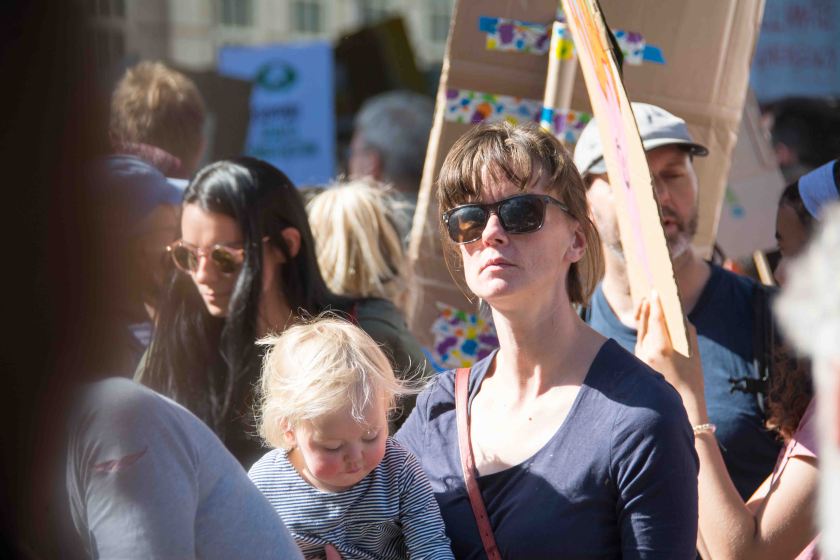
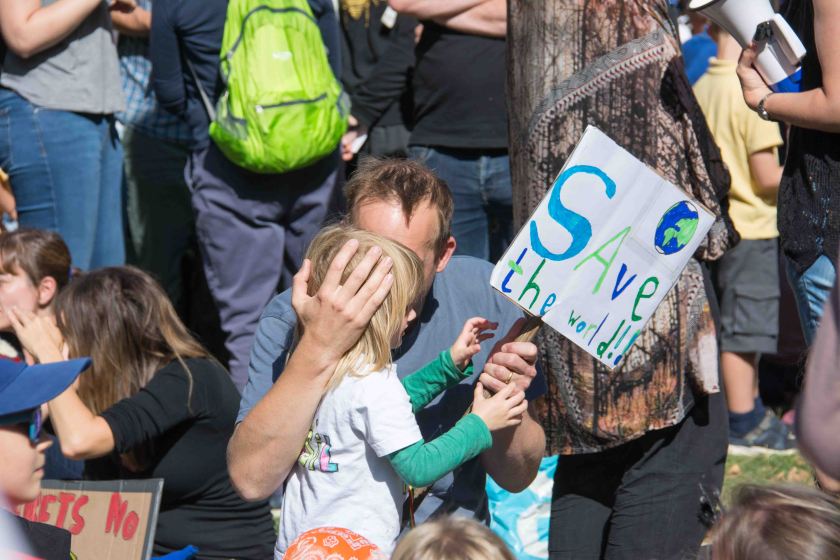
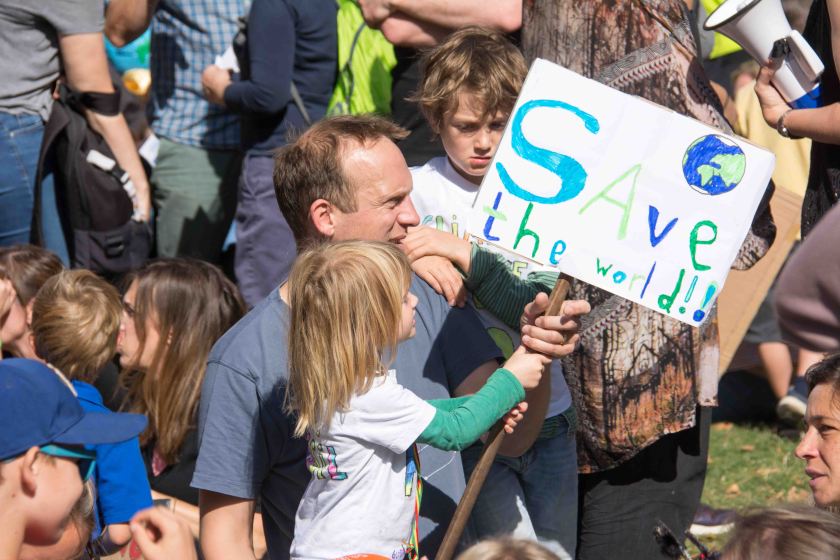
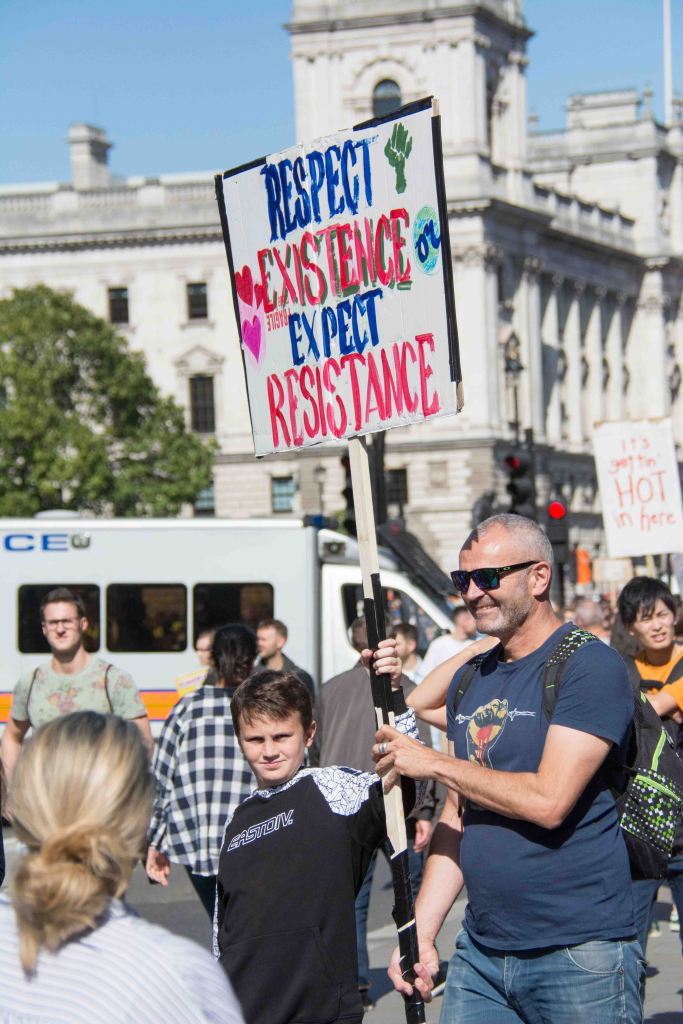
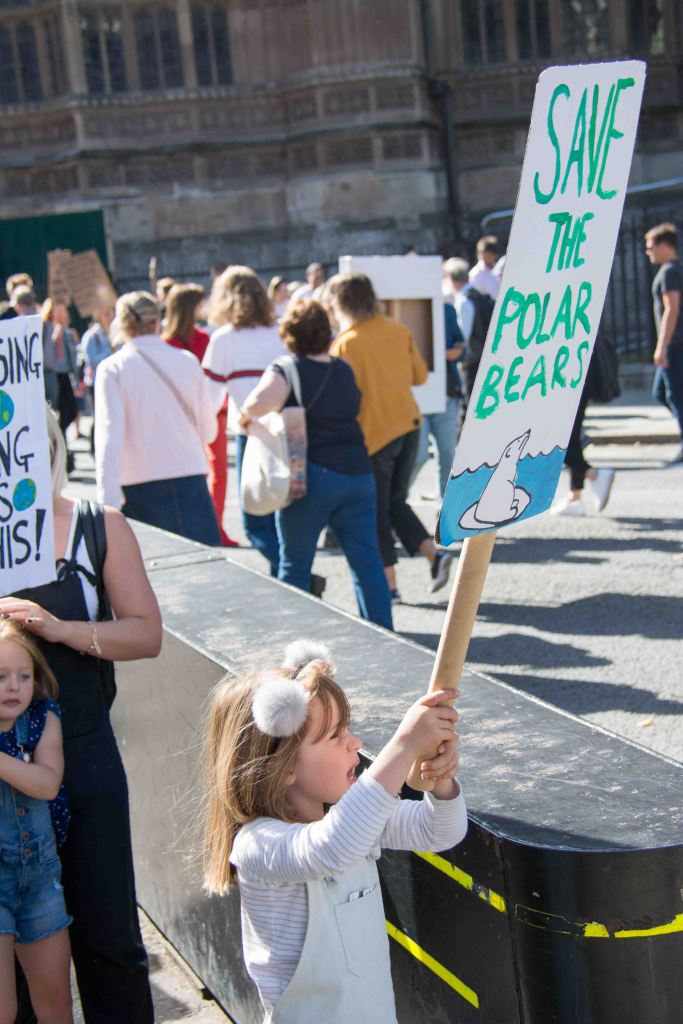
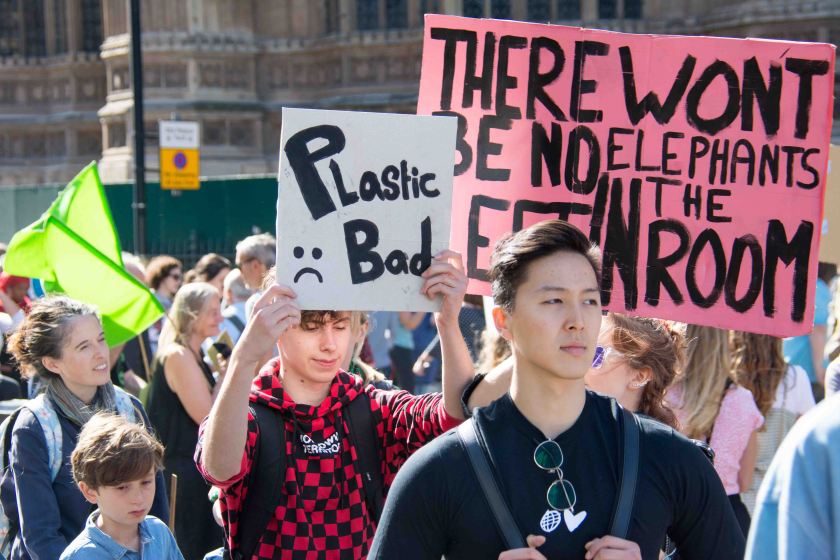
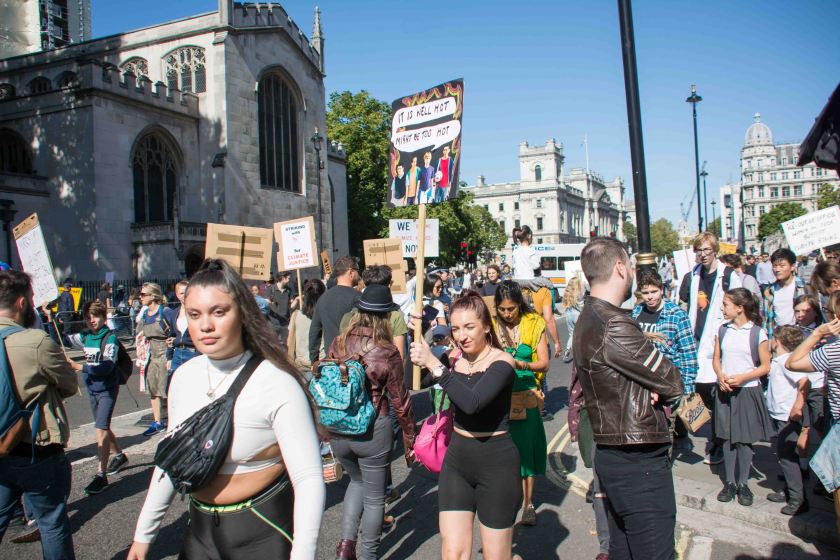
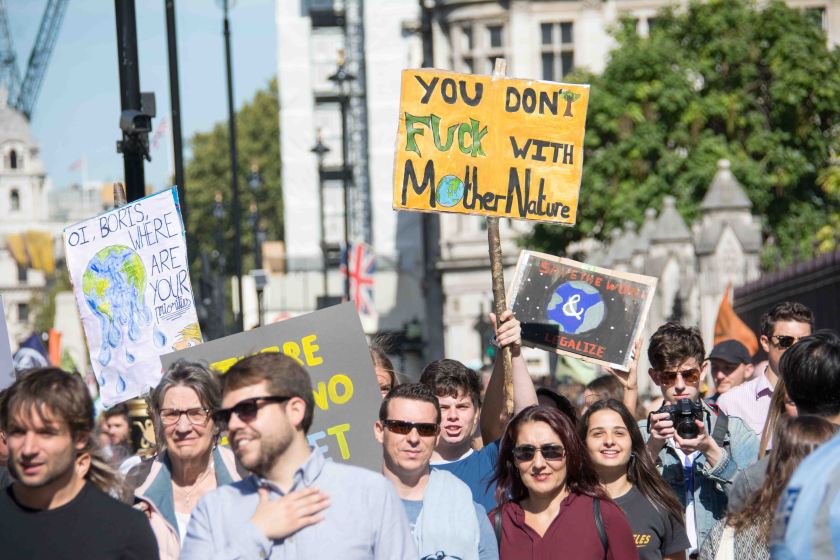
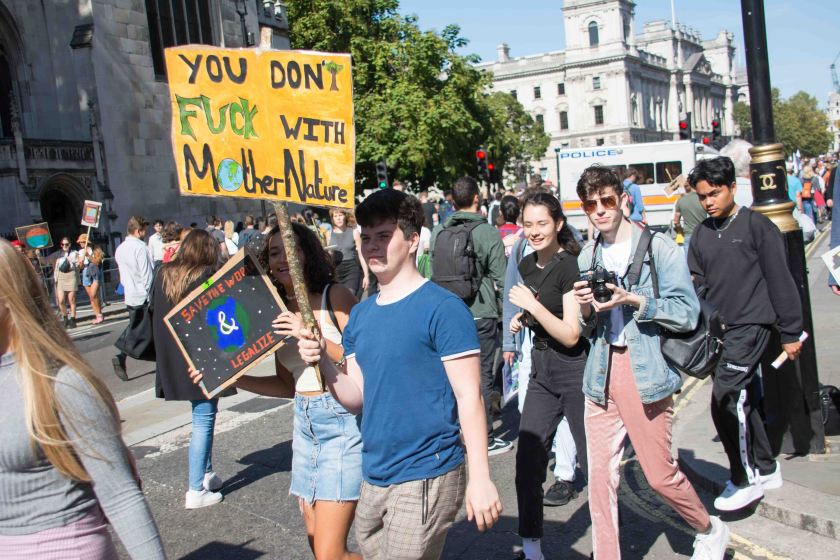
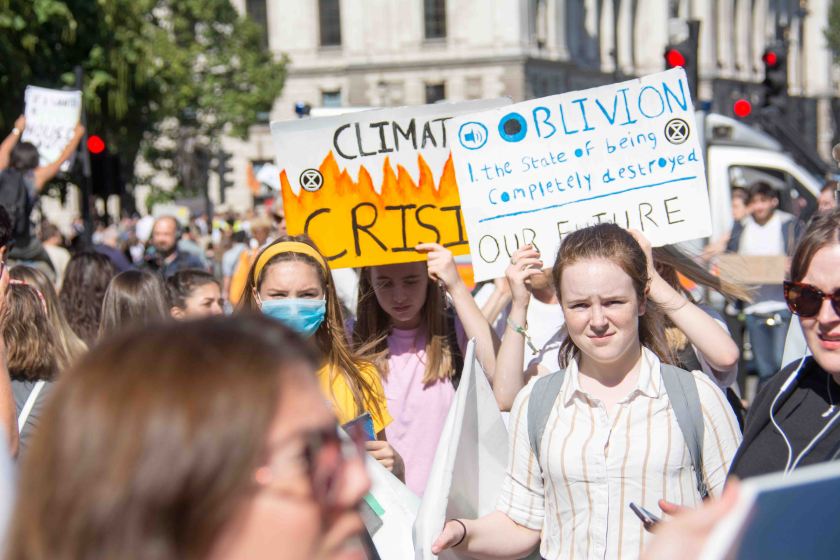
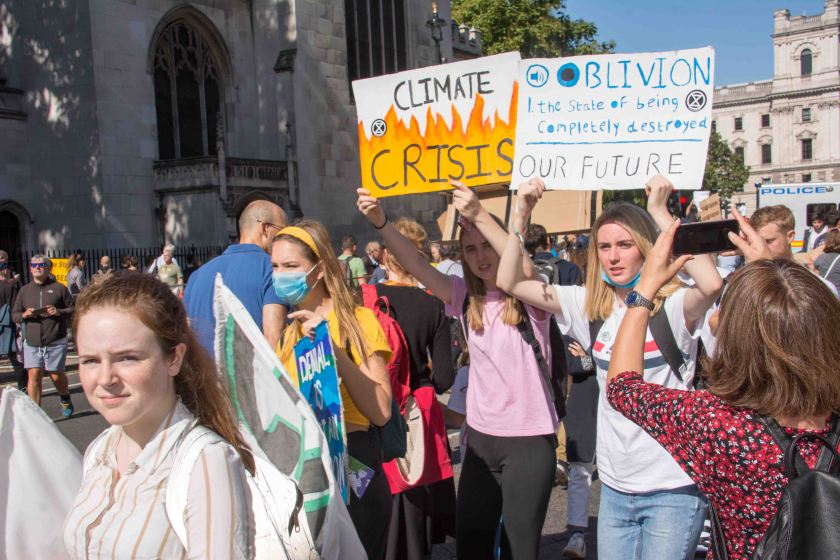
The movement “Fridays for Future” follows the example of 16-year-old student Greta, who in the summer of 2018 went on strike for three weeks in front of the Swedish parliament and protested against the inaction of the policy with regard to the climate crisis.
She talked about her activities in the social media – and countless young people from all over the world followed her.
In the meantime, more than one and a half million young people worldwide have joined the movement – drawing the attention of politics and society to the protection of the earth, to the preservation of creation. Numerous pupils and students have been on strike on many places on the world for climate protection for weeks on Fridays.
To spread their message, “Fridays for Future” depends on the media, not only on television but also via the power of pictures.
P2 – Develope ideas using lens-based technologies
Pictures of demonstrations broadcasted in medias show mostly, that they have been taken with wide angle lenses to illustrate the crowd of participants. Exposure settings concentrate on the well illumination of any sings, labels and plates to transfer the content visually. The photographer benefits from daylight which comes from behind of the side of the lens.
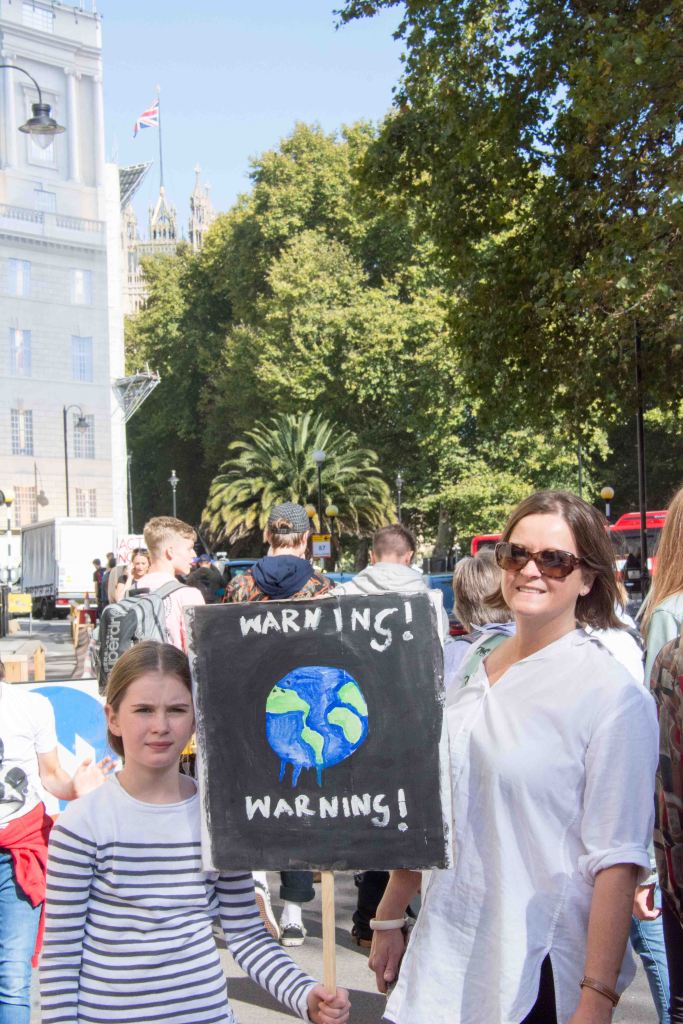
Climate Change Demonstration in London
The 20.09.2019 was a day of global activism for a change of climate politics. My son’s school was aware that some of their pupils went to go on strike and skipped school in order to participate in demonstrations to contribute to climate protection. The school was pleased about the awareness and commitment their pupils demonstrate and that the project was widely supported by their parents. We both went to London by public transport after I asked his school for permission to finish school earlier.
During the demonstration I was able to take some pictures of participants. Light conditions were ideally to well expose plates from demonstrantors.
The flash is probably the most universal light source in photography. Regardless of the power grid, it offers a lot of light in the smallest space, but can do a lot more than just compensate for the lack of brightness. Some special lighting effects are only possible with an external flash unit.
However, to benefit from its advantages, the proper use of flash light is sometimes quite tricky and need some background knowledge to in order to enjoy best results.
Basics of using flash light
The use of flash makes a lot of photos possible. A shot of which would have been blurred or underexposed without artificial light. Despite great advances in flash and camera technology, the use of a flash unit is still problematic and often does not lead to the desired result.
The most common mistakes when using a flash light are: – Red eyes, – hard shadows, – a sharp decrease in brightness, which leads to an overexposed foreground with a completely dark background
The optimal exposure of flash shots is also not easy with the digital camera, which has two main reasons:
1. The flash light itself only shines for a fraction of a second.
2. The sharp drop in brightness when using a flash unit is due to the physical basis that the light intensity decreases with the square of the distance. That means: If an object is twice as far away, only a quarter of the original light arrives. This is hardly noticeable in daylight shots, because daylight has come a long way from the sun and “a few” meters more or less play practically no role, so that even large objects are illuminated relatively evenly. The flash, on the other hand, is only a few meters away from the subject and the rapid drop in brightness is clearly visible. In practice, this means that the main subject is perfectly illuminated at a distance of two meters, but all objects that are closer to the flash unit are completely overexposed and the background sinks into black.
For the correct use of the flash unit and for optimal exposures when taking pictures with flash, it is therefore important to understand how certain settings affect the photo: – The choice of aperture affects both flash and ambient light to the same extent. – The shutter speed, on the other hand, is always longer than the extremely short flash duration and therefore only has an effect on the proportion of ambient light in the overall exposure, but the proportion of the flash light is not influenced. – The only way to change the amount of flash within the total amount of light in the photo is to reduce the flash output.
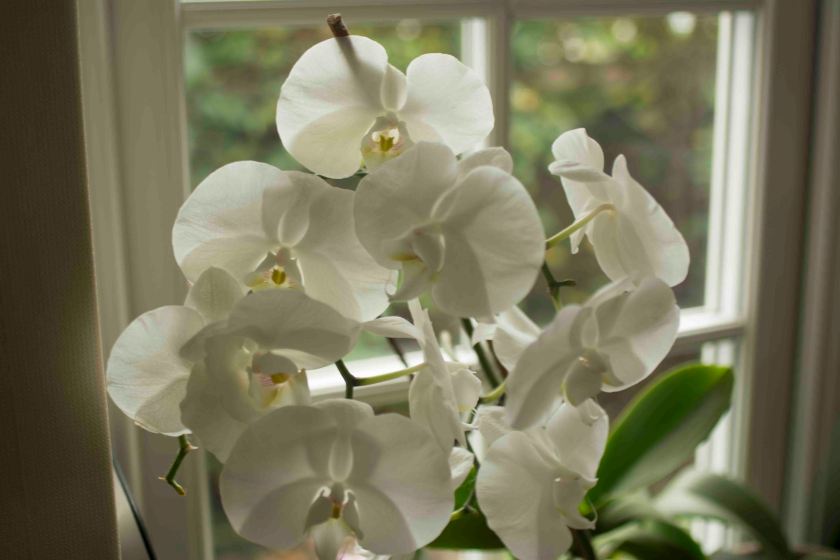
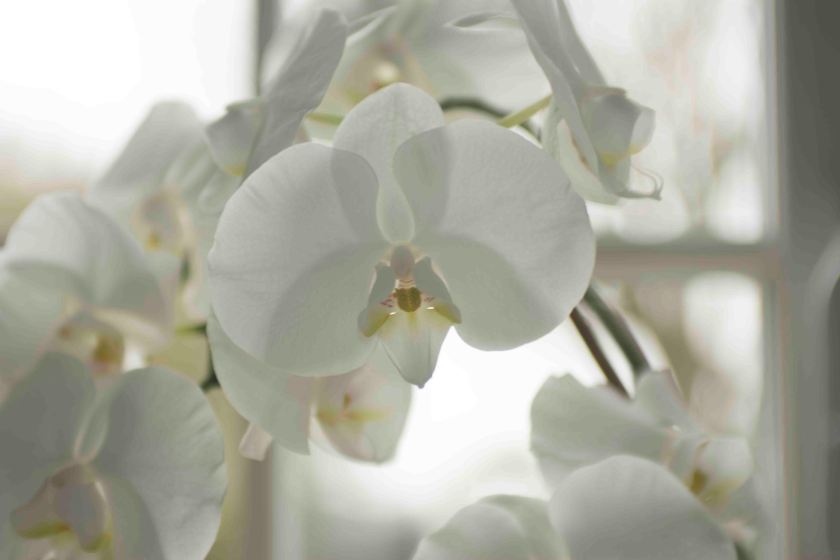
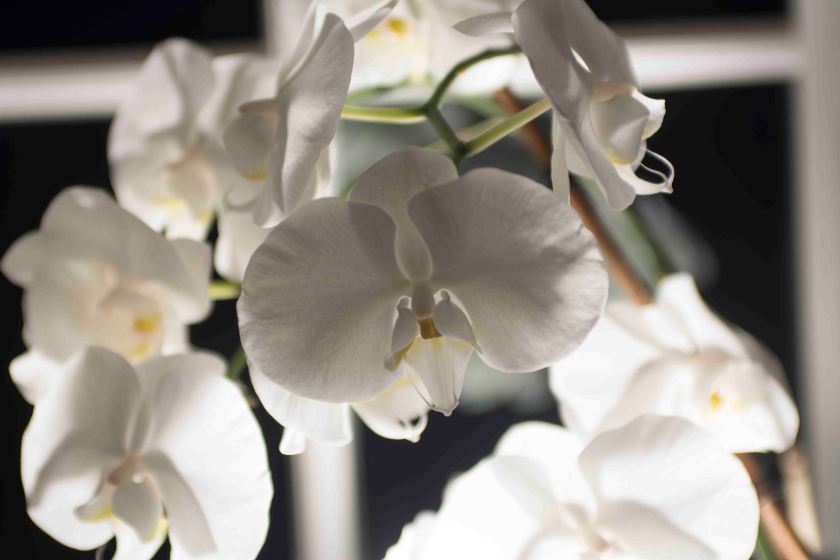
No use of flash lightuse of flash light and ambient light from behind the flower.
If the flash setting and aperture remain unchanged, but the exposure time is reduced, the proportion of the continuous light in the total exposure decreases.
Flash modes:
Modern flash units offer a variety of functions, which you can set partly on the flash and partly on the digital camera. In general there are basically three different flash modes:
In automatic mode, a sensor on the flash unit determines the amount of light reflected by the object and switches the flash off when the correct exposure has been achieved. Some camera settings are taken into account when calculating the correct exposure. When set to Manual, the flash always delivers full power (or a certain fraction of it that you set beforehand). Manual flash control is useful in some special cases such as multiple flashes. In TTL flash mode (= “Through the lens”), the camera measures the light incident through the lens (both flash and ambient light). With analog cameras, the light reflected by the film was measured during TTL flashing. Since the sensor of the digital camera (or more precisely the antialising filter in front of it) has different reflection properties, digital cameras can no longer measure the reflected light during TTL flash mode. Therefore, the flash unit fires a low-power pre-flash shortly before the actual recording, which is measured by the lens. In a fraction of a second, the camera computer makes the necessary settings for the actual exposure and controls the main flash accordingly. That’s why flash guns from analog times with TTL equipped doesn’t synchronise proper with digital camera in use. Therefore I use my old flash only in manual mode.
For most photos, the TTL flash mode delivers the best results, because its great advantage is that all exposure influences such as lens properties and even lens filters may be used in the measurement.
On camera flash – fill flash
Almost all digital cameras have a built-in flash unit, which in many cases only delivers unsatisfactory photos. The flash inside the camera is not only weak, it also illuminates the subject directly from the front and provides a frontal “gossip light” that flattens out any three-dimensionality in the photo. There is actually only one situation in which the camera’s own pop-up flash is an important aid and can be used sensibly. B. in portraits in backlight. The built-in camera flash is usually sufficient for fill-in flashing.
When taking pictures outdoors, natural sunlight is the number one light source, but it sometimes creates unwanted shadows and the camera flash is well suited to illuminating the subject in a balanced way. The frontal brightening with the integrated flash unit lowers the contrast in the image and unwanted shadows disappear.
Fill flash against bright sunlight
In many cases, the combination of daylight and flash light leads to better photos and the flash unit takes over the brightening. Select matrix metering as the exposure metering method to concentrate on a well exposure for the subject/object. After pressing the shutter button, the camera itself determines the optimal exposure and switches off the flash when the calculated amount of light is reached. As long as you make sure that the synchronous time is not exceeded, the exposures are usually correct, because the matrix measurements of modern cameras master fill-in flash surprisingly safely. With a fill-in flash you bring drawing into the shadow areas and the photo looks much more brilliant
Flash gun
Bounced flash light
While the internal camera flash works well for fill-in flashing, you need an external system flash device for all the flashing techniques described below, which should have a swivelling reflector. This means that you can not only use the flash unit separately from the camera, but also flash indirectly against the white ceiling with the flash reflector swung upwards in order to achieve even illumination.
In the case of direct flash shots, there are often pronounced dark drop shadows. To avoid this, point the reflector of your flash towards the subject against the ceiling, at a point that is about a quarter of the distance between the flash and the subject. Thanks to the light reflected and scattered from the ceiling, you achieve soft and even lighting without annoying shadows. In normal TTL operation, the camera computer has no problems in determining the correct exposure settings. The only requirement: There must be a white ceiling near the swivel reflector to avoid color casts.
Some system flash units have a small white pull-out fill in reflector, which is a good addition to indirect flashing. The small white reflector directs a certain part of the flashlight directly to the front. He brings z. B. in portraits, highlights in the eyes of the model and avoids unsightly effects such as shadows under the nose or deep black eye sockets.
Flash at front and back curtain
front curtain
back curtain
With a long exposure with synchronization on the front curtain, a moving subject pushes the light trail in front of it, which creates a very unnatural impression.
In contrast, when synchronizing with the back curtain, the light trail lies behind the moving object.
Flash syncronisation
The flash sync speed is the shortest possible shutter speed that your camera shutter is fully open. The flash sync time is also called X-sync. In short, it gives you the fastest possible shutter speed in flash photography. That means, if it is specified on your camera with, for example, 1/200 s, you can choose any slower shutter speed (1/125, 1/60, etc.). However, as soon as you set a faster shutter speed, such as 1/500 second, you will still see the rest of your shutter curtain in the form of a black bar on the picture.
different shutter sink speeds
Personally in studio I prefer working with a shutter speed of 1/100 sec to 1/125 sec. It allows me to freeze even slight movements when I’ve completely darkened the studio.
HighSpeed Sync
I’m photographing with Nikon. A FP short-time synchronization can be used when a compatible flash unit is connected. With other flash units, the exposure time is set to 1/250 s. If the camera shows the exposure time 1/250 s with exposure control P or A, the automatic FP short-time synchronisation is activated if the actual exposure time is shorter than 1/250 s.
The automatic FP short-time synchronization allows the flash unit to be used up to the shortest possible exposure time of the camera.
no flash
regular flash mode
HSS
HSS
HSS
High Speed Sync exposure times up to 1/8000 sec can be set by the camera (P and A) or preselected by the user (S or M). As a result, the largest aperture can be used to achieve a shallow depth of field, even when the main subject is shot in bright backlight.
Remote flash use with HSS and a shutter speed of 1/8000 sec
Multi flash mode
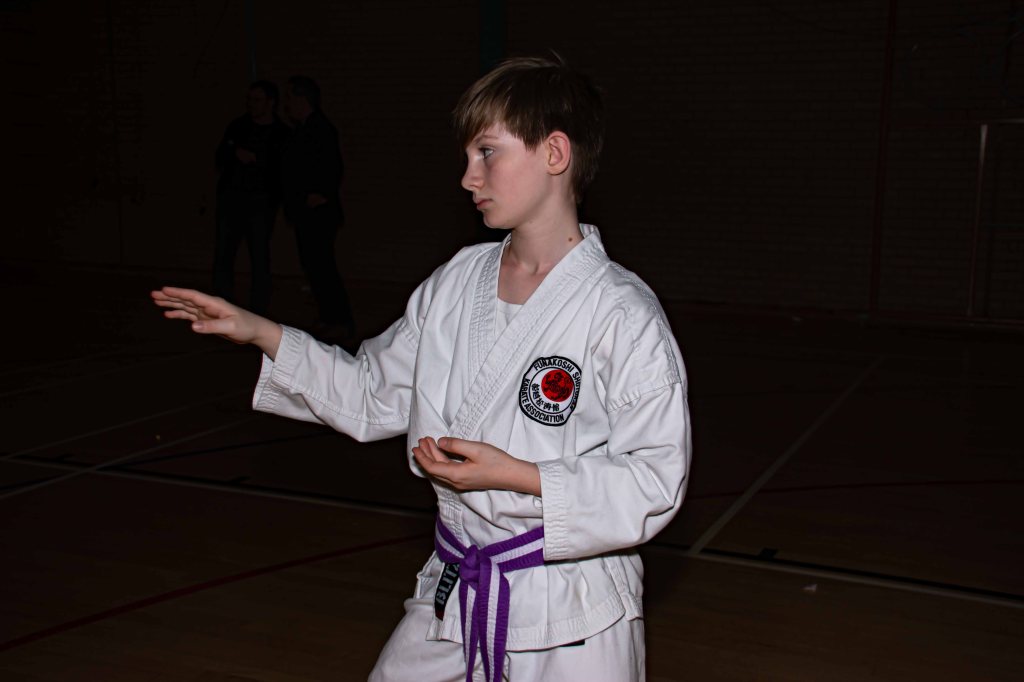
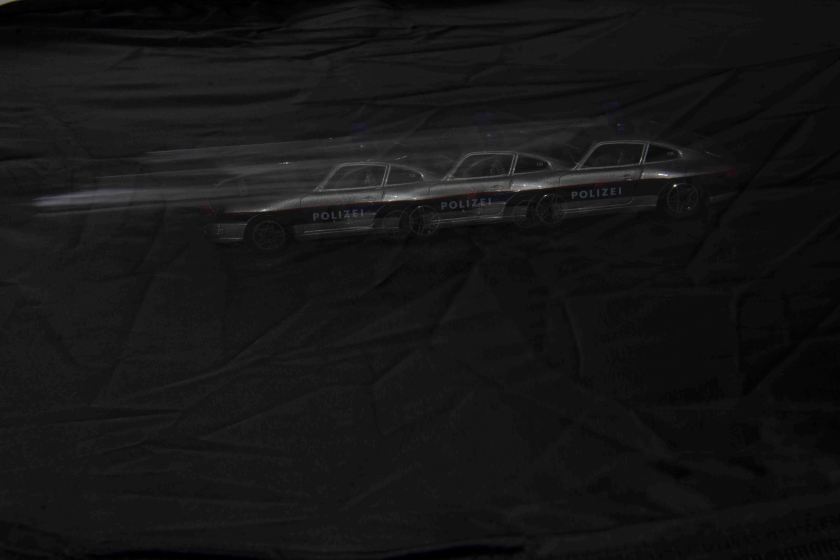
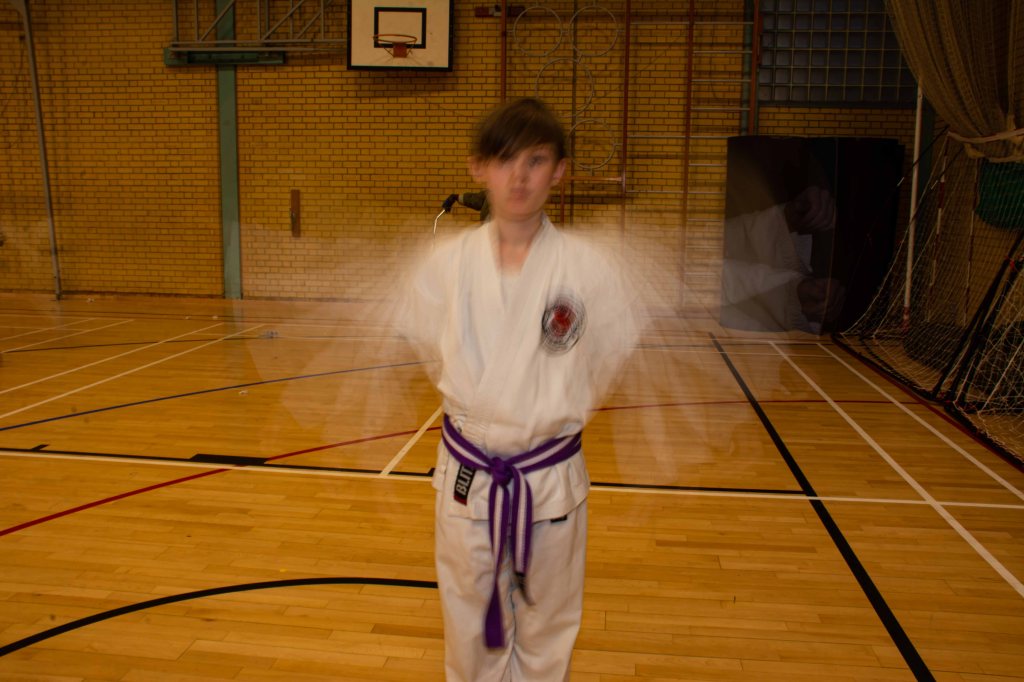
A stroboscope is a multi flash mode that emits several flashes of light in succession. With stroboscopic photography, the shutter of the camera remains open until a series of flashes is fired. The individual flashes are equally strong and follow one another at the same time interval. If the subject or the camera moves during the exposure, it is shown multiple times in a single photo.
Stroboscopic photos can not be created with the automatic, usually a series of experiments and tinkering are necessary until the corresponding result is successful.
stroposcope flash mode
Such shots work best in a darkened room or against a dark background. If the background is also exposed effectively, ghosting occurs, i.e. the individual images in the photo appear transparent.
The variable factors here are: aperture, shutter speed and ISO sensitivity of the camera, output of the flash unit per flash, total number of flashes to be emitted, the time interval between the individual flashes and the speed at which the subject moves.
With system flash units, the parameters can be set individually.
The setting on the display means, for example, the following: light output 1/32 (this means that a maximum of 32 flashes in a row are possible until recharging), 5 flashes are emitted at a frequency of 10 Hz (10 flashes per second).
Slow flash mode
no use of flash
slow sync flash
Candle light and remote flash
Reflectors
A reflector is always used in portrait photography when parts of the face and / or body receive too little light. Reflectors are excellent tools for adding fill light. It bounces existing light and re-directs it back onto the subject. They can also create catch lights in portraits and prevent a silhouette or enhance a product photo.
Using a reflector is very simple: use the reflector to reflect light in the shady areas until you are satisfied. This makes reflectors far easier and more precise to handle than an additional light source, such as the built-in flash of the camera or a flash gun.
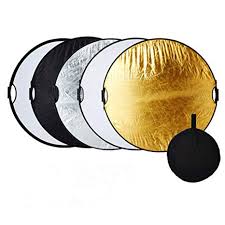
5-1 Reflector – a very affordable solution
With the versatile folding reflector, you can easily and specifically brighten, darken or soften hard light.
white / black / gold / silver / diffuse
The silver reflector is for the contrast. Gold is for a warmer tone. The white one fills shadows. The black reflector is to block the stray light.
And the ransparent diffusor is for softer lighting without creating shadows. Because the illuminated area is significantly enlarged in relation to the model, the light becomes softer. Direct sunlight, on the other hand, is a relatively small illuminated area, which leads to hard shadows. And these are distracting in portrait photography, unless you want to emphasize them.
Leasure activities for which Richmond is famous for
P1 – Identify lens-based image making
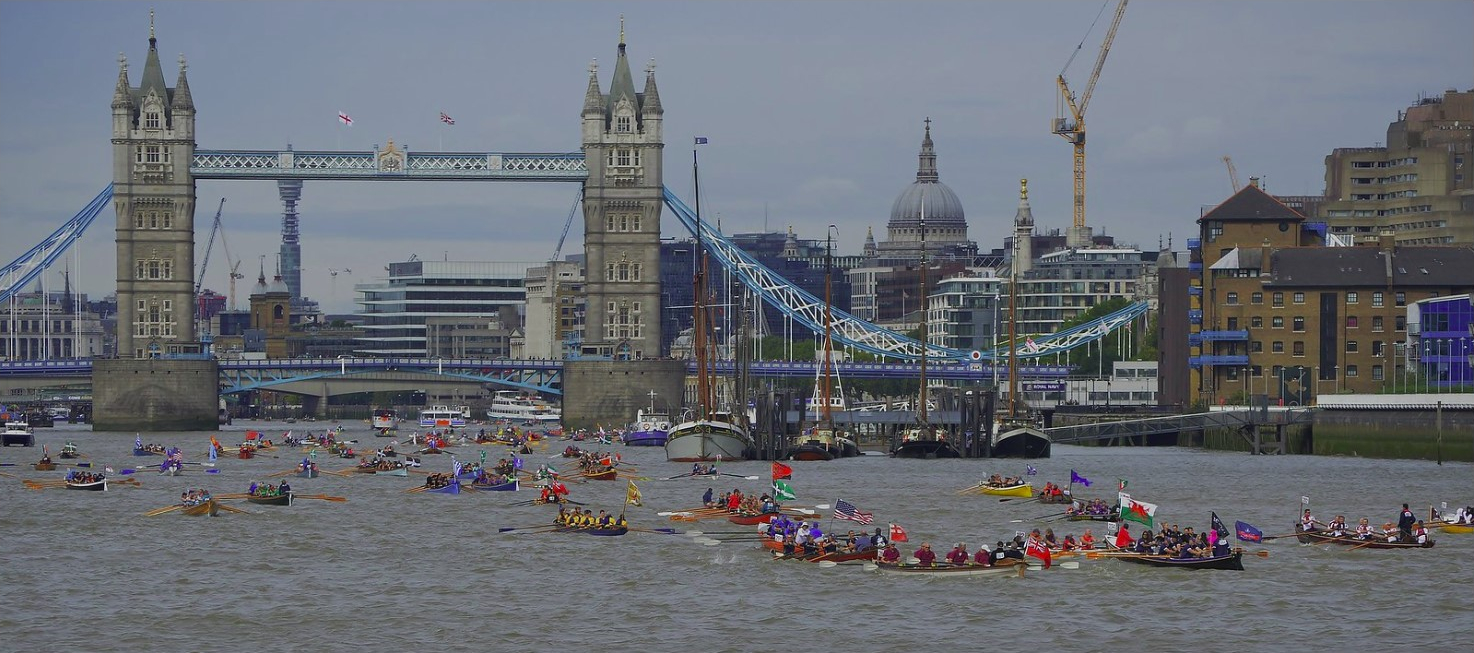
THE GREAT RIVER RACE AT RICHMOND RIVERSIDE
The Great River Race is London’s 21.6 Miles River Marathon from London Docklands to Ham in Surrey. A spectacular boat race up the River Thames, it attracts over 330 crews from all over the globe.
(c) flickr.com
The River Thames runs for over 10 miles through the borough, linking Hampton Court Palace, Richmond Town Centre and Kew Gardens with London. Richmond rivals anywhere in London with its beautiful Royal Parks and open spaces.
My son’s local school also attends this race with one gig boat every year.
We’ve been living in Richmond upon Thames as a German/Austrian expad family for about three years. As we love nature and enjoy any outdoor activities, Richmond provides the perfect getaway. It is probably London’s most attractive borough to facilitate any type of activities, even when it’s raining :-).
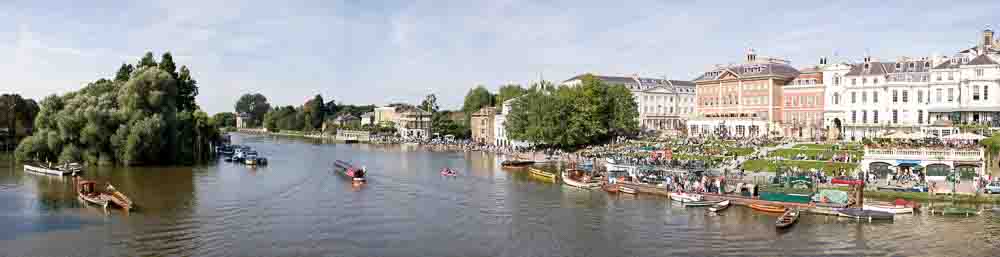
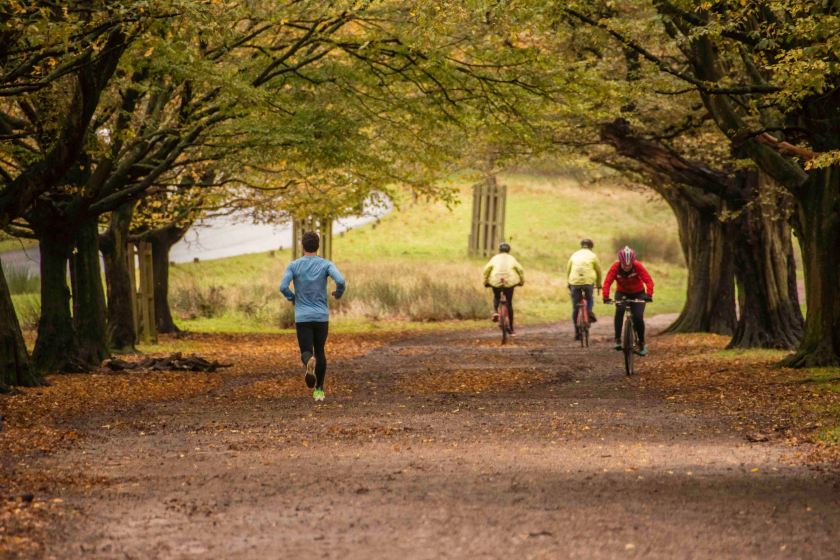
PEOPLE SIMPLY ENJOYING RICHMOND PARK
Richmond Park is one of London’s eight Royal Parks and covers an area of 2500 acres. The park is a top UK site for ancient trees and supports a range of rare species including fungi, birds, beetles, bats, grasses and wildflowers.
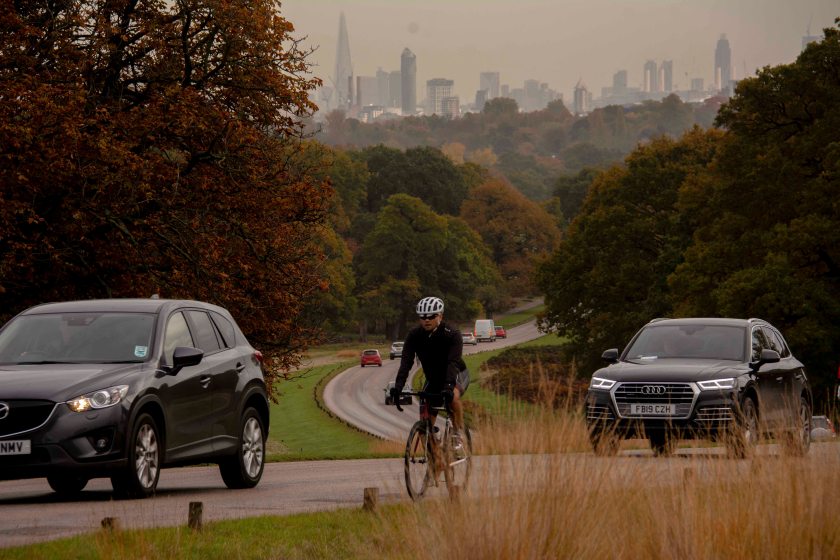
Richmond Park has protected status as an important habitat for wildlife and is a National Nature Reserve, London’s largest Site of Special Scientific Interest and a European Special Area of Conservation. As there are many restrictions to traffic this place makes it unic in terms of enjoying walks, cycling or even horse riding in the middle of deers and other wild life along the Tamsin Trail. It is also the focal point for London Dynamo to practice road biking on a more ambitious way.
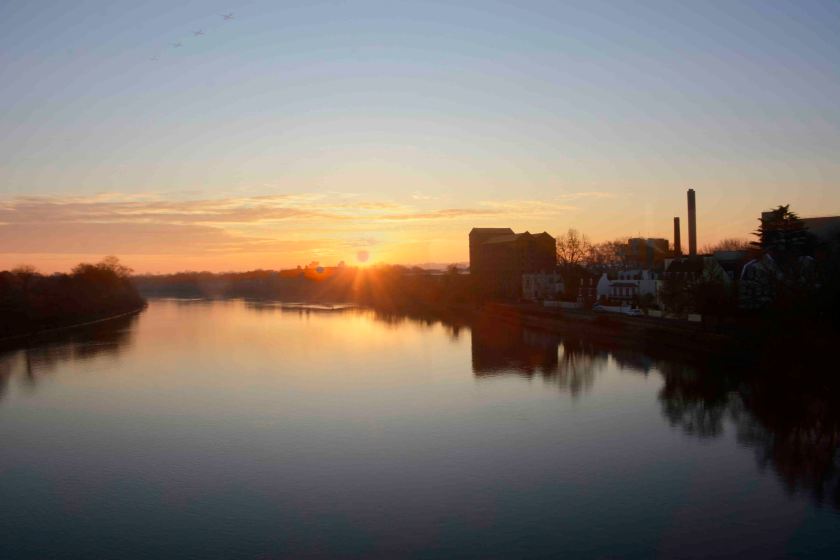
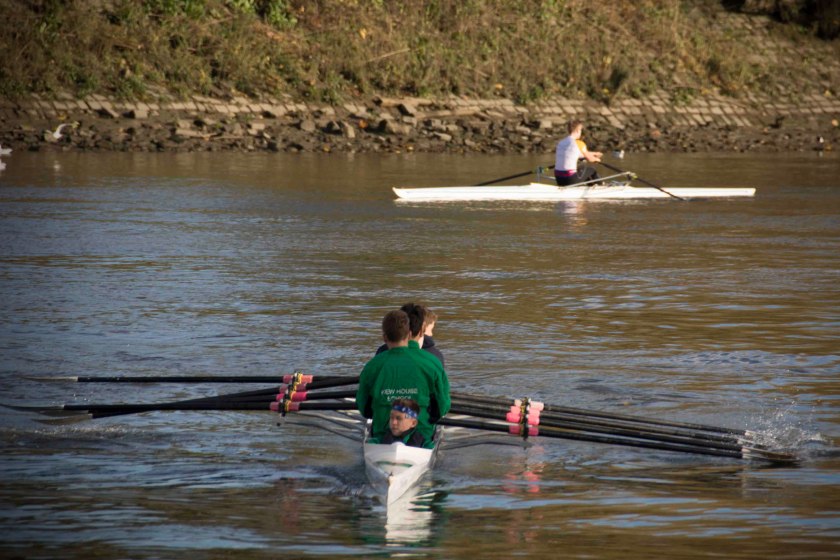
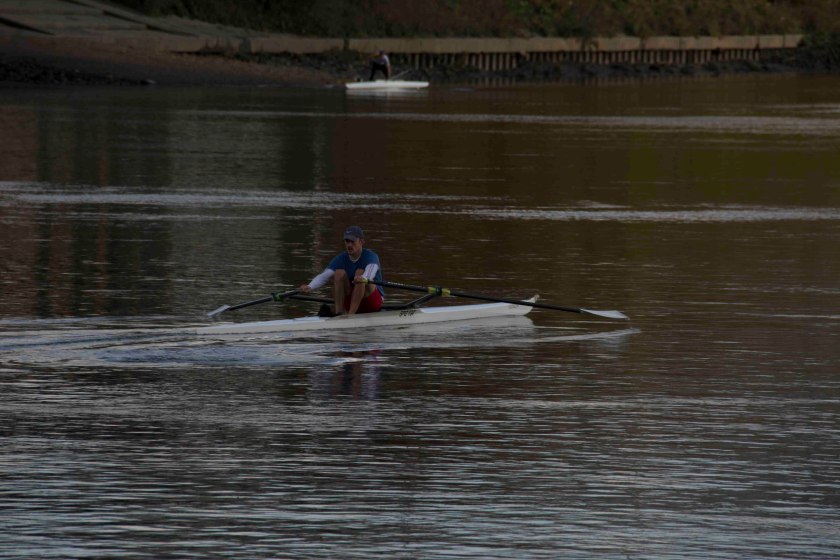
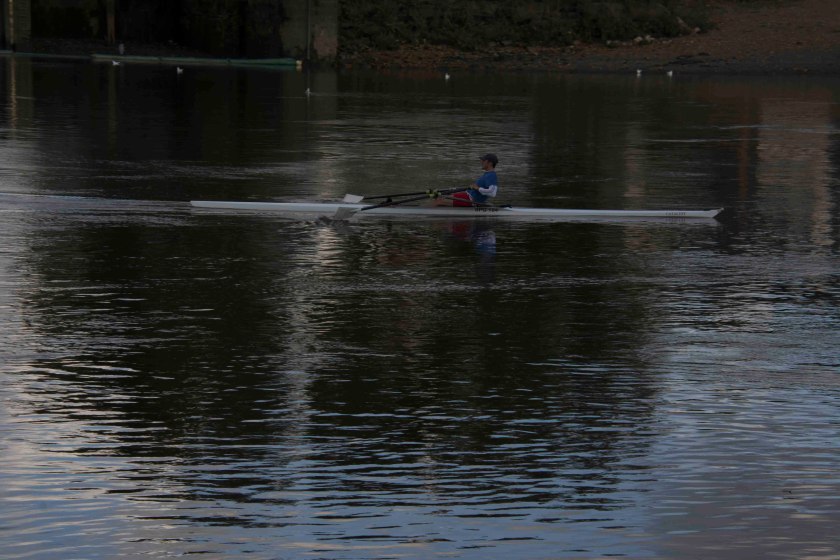
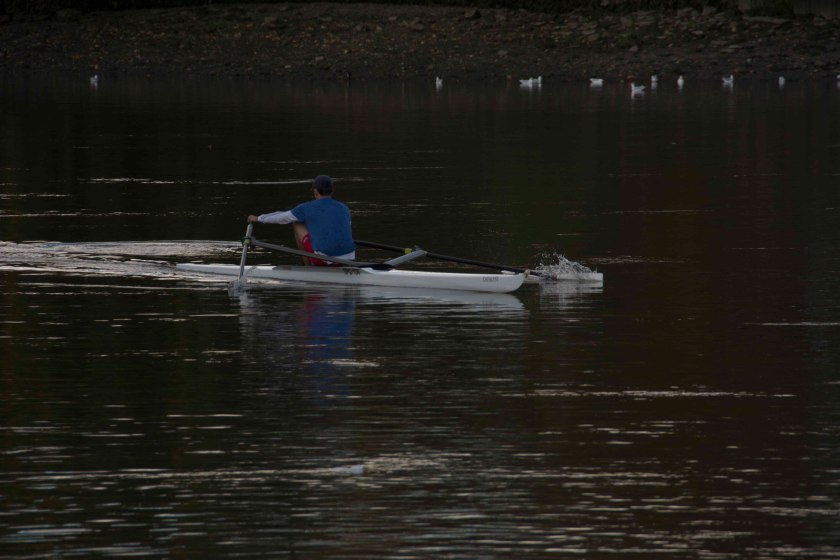
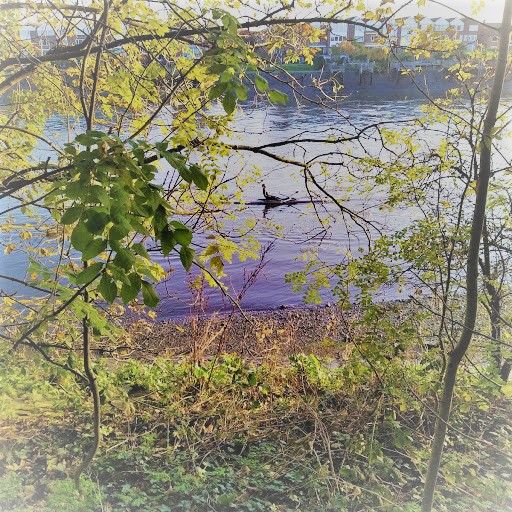
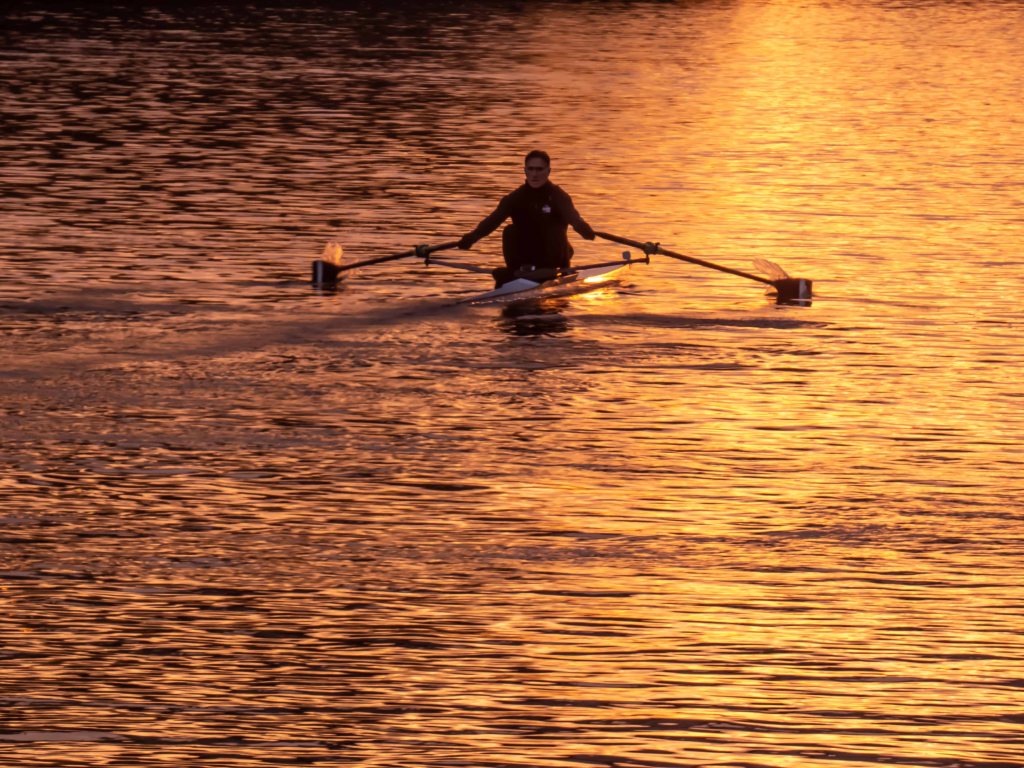
As we currently live in Kew the Thames towpath is very close to our residential area. Posessing a Husky dog in our family, it makes it nearly unimpossible to avoid walks there on a daily basis. I was always worrying not to have a camera handy, when I had a spot on rowers and people being in canoes in the early morning hours. Watching them in silence has something which makes yourself calm. So I took my camera with me and could take some nice shoots.
Some photos of leisure activities taken at Richmond Park
P3 – Final shots for lens based Image Making P4 – Use lens-based technologies and techniques within own work
Camera used: Nikon D7100, at aperture with a shutter speed of to freeze water splashes. resizing proportions scale The picture was taken against the sunlight to highlight simply on the silhouette of the rower and catching light reflections on the surface of the boat.
Camera used: Nikon D7100, at aperture that the background gets slightly less blurry. with a shutter speed of resizing proportions scale perspective
Camera used: Nikon D7100, at aperture with a shutter speed of resizing proportions scale perspective
Camera used: Nikon D7100, at aperture with a shutter speed of resizing proportions scale perspective
Camera used: Nikon D7100, at aperture with a shutter speed of resizing proportions scale perspective
P5 – Review own lens-based outcomes
For me personally I’d tried to focus on a real interpretation of people and the invironment in place them for this project into their surrounding area. For that reason it was quite obvious to focus at outdoor leasure activities as my choosen filed as Richmond offers plenty of it. Furthermore outdoor sport activities are also one of my interests. As I focused on outdoor activities, there are of course some constraints in terms of the quality of ambient light, position to the subject and the sun and time. I took most of the pictures early in the morning. You also have to take into consideration that wet wheather conditions may cause harm to any photo equipment, therefor planning makes it a bit difficult since you may stay for a longer period on site to get the picture you were thinking on. However appropriate clothing would always be a good choice. In terms of sufficient pasing people it may be an advantage to look at any particular events. That would certainly raise the amount of good shoots.